Check out these useful items
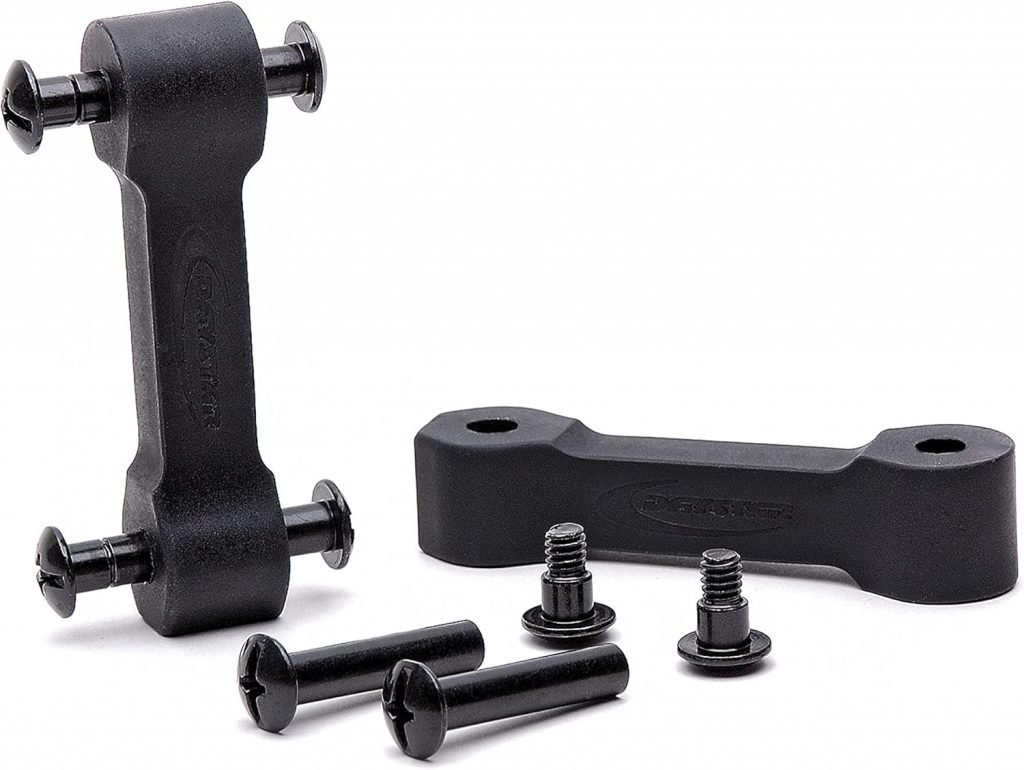
Daystar Hood Latch Upgrade Black Compatible with/Replacement for 2007-2018 Jeep Wrangler JK
Latest Blog Posts
- Jeep JK A/C Blend Door Actuator Replacement
- Jeep JK 3.6L V6 thermostat housing replacement
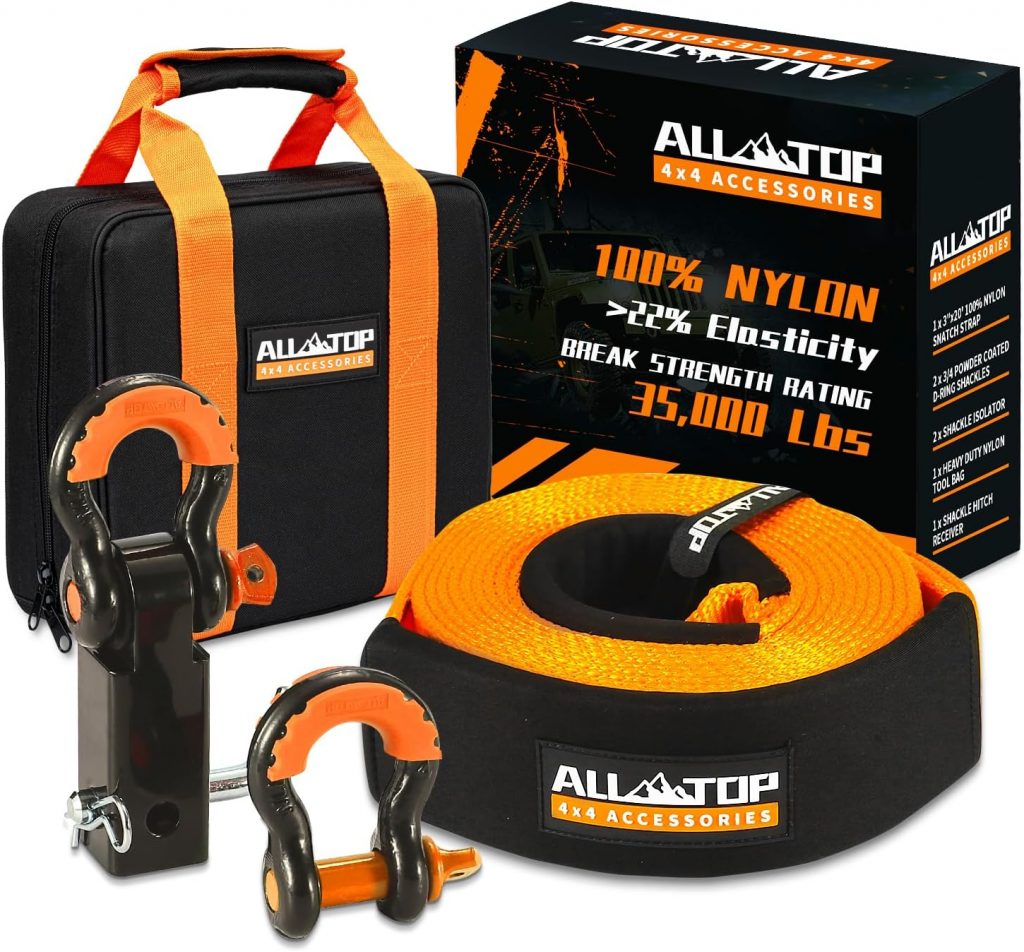
- My Jeep recovery gear
- Jeep JK 3.6L Pentastar Engine Oil Change
- Jeep JK Differential Fluid Change
- Jeep JK multi-function switch replacement
- Jeep Wrangler JK and JL Factory Bolt Sizes
- Jeep JK Jack Base by AEV
- Jeep JK Tailgate Tire Carrier by Rugged Ridge
- Jeep JK Dash A/C Vent Removal
Audiobook Recommendation

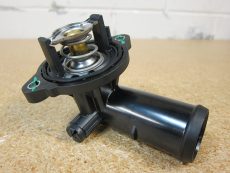 This post is my attempt to describe the process of replacing a thermostat housing on a 2012 Jeep JK with a 3.6L V6 Pentastar engine. The primary function of a thermostat is to maintain a minimum operating temperature in your car’s engine. When you start your engine cold, antifreeze / coolant mixture is kept within the engine by the thermostat. When the coolant temperature reaches the specified opening point of the thermostat, it opens. Coolant will then flow through the radiator to keep the engine at a temperature close to the rated temperature of the thermostat.
The reason I needed to replace my thermostat was because one morning while driving to work, the “check engine” light came on. When I got home I plugged in my Flashcalto read the code. It was a p0128 code (an indication of a faulty thermostat or ECT – engine coolant temp sensor). After talking to few people I decided that the first thing I’m going to replace is a thermostat and see if that fixes the problem. I got the new thermostat housing and a gallon of coolant at my local dealership ($34.00 and $24.00 respectively).
VERY IMPORTANT: Make sure you get the correct type of coolant for your Jeep if you’re going to be adding it to your system. Read this post before proceeding any further!
Remember that if you drive a MY(model year) 2012 or older Jeep Wrangler you need a HOAT (Hybrid Organic Additive Technology) coolant, and if you drive a MY 2013 and newer Jeep Wrangler you need an OAT (Organic Additive Technology) coolant. These two types of coolants DO NOT MIX!
Like I mentioned before I own a 2012 JK so that’s the last model year that uses the HOAT coolant (Mopar part number 68048953AB, label on the bottle states 5 Year / 100,000 Mile), and this is what this post is written for. The procedure for Jeep JK thermostat housing replacement is the same for either type of coolant though.
Also if you buy concentrated coolant, you need to get a gallon of distilled water to mix it with, before adding it into your cooling system.
If you plan on doing a full flush of your cooling system, make sure you have enough fresh coolant before you start. I believe the entire system uses about 3.5 gallons, but you need to refer to your manual or talk to a Jeep mechanic to confirm.
Disclaimer: Like I always mention I am not a professional mechanic, I just try to do as much work on my Jeep as possible. It helps me learn more about my vehicle and save some money that can be spent on parts and upgrades.
I take no responsibility for any injury or breakage which might occur if you decide to follow these steps. You have to decide if you’re comfortable working on your Jeep. If you’re not, please have a professional do the installation for you.
As an Amazon Associate I earn commission from qualifying purchases. It allows me to offer contents of this website free of charge to everyone.
Tools needed:
1. Ratcheting socket wrenchwith a 10mm socket
2. Pliers
3. T30 torx socketwith short extension
4. Drip tray
5. Empty 1-gallon jug
7. Funnel
8. Clean shop rags
9. Plastic scraper (if need be)
10. Flashlightor head lamp
Procedure:
Step 1:
Make sure you are parked on level ground and you let the engine cool down. Open your hood and remove the engine cover.
Step 2:
Using your socket wrench and 10mm socket, remove the two bolts holding down the air intake plumbing between the air box and the throttle. Then using your flathead screwdriver, loosen the hose-clamps at the airbox and the throttle. Also pop out the thin radiator overflow hose from the clips near where the 10mm bolts come out. This small hose stays in place, but just needs to be removed from the clips.

Step 3:
Disconnect the air temperature sensor on the bottom-side of air intake hose.

I found it impossible to disconnect it in it’s original position. I decided to carefully disconnect the intake plumbing first and flip it on it’s side to have a better view of the sensor.

With a better view of the sensor I was able to squeeze the little tab on the plug and disconnect the sensor with no problem.

Step 4:
With the intake plumbing removed you will have much better view of the thermostat housing and an easy access to it.

Step 5:
Find yourself one of these skinny 1 gallon plastic jugs and cut the top off.

Step 6:
Put a drip tray (and maybe some towels or cardboard too) on the ground underneath and place the plastic jug just under the upper radiator hose clamp that secures it to the thermostat housing.

Step 7:
Take off the radiator cap to relieve any pressure that might be in the cooling system.
OPTIONAL: To limit the mess of coolant draining out of the upper radiator hose when you detach it from the thermostat housing, you can drain the coolant from the radiator at this point. You can drain the coolant using the radiator draincock located on the bottom of the radiator just below the filler neck. Attach a hose to the draincock and drain the coolant to a large container (be careful and keep pets away, coolant is toxic & dangerous).
Usually you’ll be able to drain about 1,5 gallons, so be sure you have enough new coolant on hand.
You can find videos on Youtube that show how to drain coolant on a Jeep JK.

Step 8:
Squeeze the radiator hose clamp and slide it down the hose away from the thermostat housing.

After the clamp is off, twist and pull the hose off the thermostat housing and aim it into the bucket since the coolant will start draining immediately.

Step 9:
Using your T30 Torx Socket, with socket wrench and short extension, loosen the bottom and top bolts holding the thermostat housing to the engine block. Re-position your plastic jug under the housing. Note: The housing will be likely stuck to the engine block. Start slowly lifting it from the bottom since much more coolant will leak out from behind the thermostat immediately. It will probably be difficult to get this coolant into the bucket below, which is why I had another drain pan on the ground. A couple of shop rags will help clean up the extra coolant that you can’t catch.

Step 10:
Remove the old thermostat housing and take a look to see if the gasket came with it. In my case the old gasket was left behind. Make sure you peel this off as the new thermostat housing has a new gasket already pressed into it.

Make sure you scrape away any excess residue or piece of the gasket left behind. Start with a plastic scraper (plastic card) so you don’t mar the mating surface (which may end up causing more leaks).

Step 11:
Install the new thermostat housing in the same orientation as the one you just removed. Replace the top and bottom T30 Torx bolts. I believe these should be torqued to 105 in-lbs. If you don’t have a torque wrench, then you should be safe with getting the bolts snug tight, then about a 1/4 turn after that. The key here is to NOT over-tighten them. You can loosen the bleeder screw on the top of the new thermostat housing a bit at this point as well.

Step 12:
Replace the radiator hose and hose clamp onto the new thermostat housing. Make sure you push the hose up to the stopper on the thermostat housing and then replace the hose clamp so that it is beyond the “knurled” end of the housing.

If you buy the concentrated coolant, you need to mix it 50/50 with distilled water.

Step 13:
Place a funnel securely into the radiator filler neck (you can wrap the narrow end with duct tape if it doesn’t fit tightly into the filler neck) and add coolant until it starts to bleed out of the bleeder screw you just loosened. Then tighten down the bleeder screw (hand tight, I used a pair of pliers because access was pretty tight, but again do not over-tighten.) You can now remove the bucket from earlier that should have drained coolant in it.

Step 14:
Continue to top off your radiator with coolant. You’ll want to fill until the bottom of the filler neck has coolant in it, but not all the way to the very top of the neck.
Top off your coolant reservoir bottle to the max line. Your coolant bottle is best viewed from the drivers side looking down. Use a flashlight to help see the MAX and MIN lines if need be.
Step 15:
Replace your air intake plumbing that you removed in step 2. Don’t forget to reconnect the sensor wire at the backside, and re-clip the small hose in at the bolting locations. Use the two 10mm bolts and hand tighten them down. Then hand tighten the hose clamps at the airbox and throttle side with the flathead screwdriver. Be careful not to over-tighten anything.
Step 16:
Keep the funnel inside of the radiator filler neck and add enough coolant to fill the bottom 1 inch of the funnel.
Step 17:
Go into your Jeep and turn the heat to the hottest setting. Make sure the A/C is NOT on. Start the engine, get out of the Jeep and check for any leaks that may be occurring from a loose hose, bleeder screw, etc. Let the engine run for a few minutes.
Keep an eye on the temp gauge in the cabin (or on the EVIC if equipped), if it starts to creep above the halfway mark (about 225-230 def F) at any point turn off the engine (you may have an additional problem that has not be covered here).
Step 18:
While the engine is running and warming up, you’ll notice that the level of the coolant in the funnel changes. Once the engine reaches correct temperature, the thermostat opens and the coolant level will typically drop quite a bit. Top off the coolant while the engine is running, again only to the top of the filler neck. The level might rise as the coolant heats up. You’ll also notice air bubbles coming out, which means the air is being bled from the system.
Step 19:
Once the coolant level stays consistent, turn off the engine and wait several minutes.
Step 20:
Stick a long screwdriver wrapped with a towel inside the funnel and plug the bottom of it (the coolant might still be HOT). Place an empty drain pan right next to the filler neck and carefully move the funnel into the drain pan. Make sure the coolant level is about half way up the filler neck leaving enough room for the cap, and install the cap.

Step 21:
Let the engine cool down completely. After it’s cool, check the reservoir bottle and radiator and add coolant as required back up to max (DO NOT open the radiator unless the engine is cool). Start the engine again (heat still on), close the hood and give it a quick drive around the block/down the street for a minute or two until you get the temp gauge to the center (195-210 deg F). Again, keep an eye on the temp gauge during this process. Then let the engine cool and check your coolant levels again. You may need to repeat this process a few more times depending on your situation (may take a few hours depending on the ambient temperature outside). Keep checking for leaks during this process and over the next few days.

Step 22:
Your “Check Engine” light will not disappear immediately after replacing the thermostat housing. Your computer performs diagnostics each time you turn on the engine. You need three trips (at least few miles each) with no problems detected, for the computer to stop displaying the warning light. As long as it goes away after the third trip, you succeeded in fixing the problem. If the warning light stays on, it means that there is another problem. In case of the p0128 code, it might be the engine coolant temp sensor.
Hope this helps someone else out there!