Check out these useful items
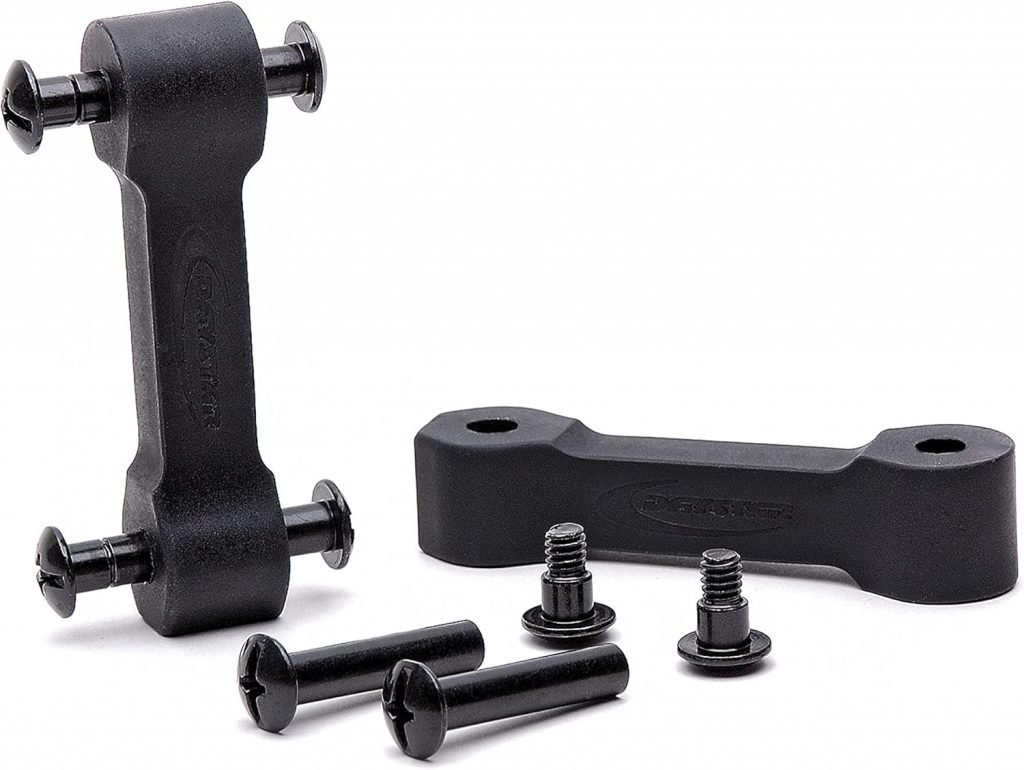
Daystar Hood Latch Upgrade Black Compatible with/Replacement for 2007-2018 Jeep Wrangler JK
Latest Blog Posts
- Jeep JK A/C Blend Door Actuator Replacement
- Jeep JK 3.6L V6 thermostat housing replacement
- My Jeep recovery gear
- Jeep JK 3.6L Pentastar Engine Oil Change
- Jeep JK Differential Fluid Change
- Jeep JK multi-function switch replacement
- Jeep Wrangler JK and JL Factory Bolt Sizes
- Jeep JK Jack Base by AEV
- Jeep JK Tailgate Tire Carrier by Rugged Ridge
- Jeep JK Dash A/C Vent Removal
Audiobook Recommendation

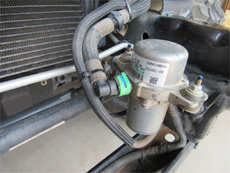 All 2012-2018 Jeep JK models have the vacuum pump installed in a bracket located on the inside of the driver side frame rail right behind the bumper.
The vacuum pump is there to give added power when braking under emergency situations. It’s part of the BAS/PBS (Brake Assist System/Panic Braking System) and is included in all of the Chrysler vehicles that have the 3.6L engine.
When you make a decision to upgrade the front bumper on your Jeep, you need to realize that the vacuum pump might need to be moved to a different location.
Relocation is only necessary for aftermarket bumpers with recessed winch plate located between frame rails. Relocation is not necessary for non-winch bumpers or top fairlead mount bumpers, where the winch sits on top of the bumper. For bumpers where the winch is mounted on winch plate installed between frame rails, vacuum pump bracket, which is welded to the frame rail, needs to be removed to allow the winch plate to fit.
The most popular option is to relocate the pump into the engine bay, near the Jeep’s computer. After relocating it into the engine compartment, do not be surprised that you’ll hear the vacuum pump run a couple of times after releasing the brake pedal during each cold start. It is rather loud and that is probably the reason behind it’s stock location, as far from the cabin as possible. Getting used to that noise is just a price you’ll have to pay for customizing your rig.
Jeep JK vacuum pump relocation is not a complicated and difficult task. The entire project should take about 2 hours (including grill and bumper removal and reassembly) and you only need few tools. If you prefer to watch a video, here’s one for the bracket kit I selected.
This step-by-step write-up is for a Metalcloak Vacuum Pump Relocation Kit. There are several other kits available out there (e.g. Teraflex Kit, Rock Hard 4×4 Kit, MBRP Kit, Rough Country Kit, Rock Slide Engineering Kit). Some brackets will be installed in the same location and some in other locations, therefore some of the steps described below might not apply to your situation.
Disclaimer: Like I always mention I am not a professional mechanic, I just try to do as much work on my Jeep as possible. It helps me learn more about my vehicle and save some money that can be spent on parts and upgrades.
I take no responsibility for any injury or breakage which might occur if you decide to follow these steps. You have to decide if you’re comfortable working on your Jeep. If you’re not, please have a professional complete this project for you.
IMPORTANT: Relocating the vacuum pump will most likely void your warranty on the pump.
As an Amazon Associate I earn commission from qualifying purchases. It allows me to offer contents of this website free of charge to everyone.
Parts and tools needed:
1. Metalcloak Vacuum Pump Relocation Kit – I selected this one, however there are several other kits available
2. 8 feet of 18-gauge wire (4 ft of red and 4 ft of black, or any combination you prefer)
3. Wire Loom
4. 18-22 Gauge Watertight Heat-Shrink Butt Connectors
6. Cable Ties
7. 3/8″ Ratchet and a 10mm socket
8. Drill and 7/32″ drill bit
11. Flat Head and Phillips Screwdriver
12. Clip/Fastener Removal Tool
Procedure:
Step 1:
Prepare your tools and get everything ready before you start the project.
Step 2:
In order to gain easier access to the vacuum pump, its wiring, and the bracket it’s attached to, I would suggest removing your Jeep’s grill, top plastic bumper cover and the bumper itself. Start by removing the grill.

Step 3:
Unplug both turn signals and remove the six plastic clips on top of the grill. Lift the center core of each clip with flathead screwdriver and pull the clip out. Starting from one side, pull on the bottom of the grill to release the push-in clips which secure the grill to the body of the Jeep.

Step 4:
Remove the top plastic bumper cover. Using a philips screw driver, gently unscrew the center core of both plastic retainer clips and pull the clips out. The screws are made out of soft plastic and unless you’re very careful, they will most likely strip out. In that case simply drill out the center core using a 7/32 inch drill bit.

Step 5:
With the clips out and the grill not in the way, you can easily remove the top bumper cover.

Step 6:
With the top cover gone, you have good access to the vacuum pump, however removing the whole bumper will give you much more room and even better access to the pump and the bracket.

Step 7:
I would highly recommend that you disconnect the negative terminal of your battery, since the project involves cutting and reconnecting the pump’s wiring.

Step 8:
Remove vacuum pump from the bracket.
Model year 2012-2014 JK’s will have studs permanently attached to the bracket and model year 2015-2018 JK’s have regular bolts and nuts.

Step 9:
Disconnect the large vacuum line and small exhaust hose from the pump. The small hose simply slides out.

Step 10:
To release the large vacuum line, pop the green retainer clip off the quick disconnect using a small screw driver. That will allow the connector to slide right off the pump.

Step 11:
Disconnect the electrical harness to free the pump and sat the pump to the side. Peel open some of the stock wire loom and cut the wires about two inches from the plug.

Step 12:
Identify the vacuum pump line in the engine bay.

Step 13:
Start freeing the vacuum pump line from clips and zip-ties securing it in place.

Step 14:
Pull or cut the retainer clip securing the vacuum pump hose below the washer fluid bottle. This clip is difficult to get to.

Step 15:
Disconnect the vacuum pump hose at the push-in coupler near the a/c line fill port. Remove the coupler from the section of the hose coming from the engine. If you’re having trouble removing it (mine crushed while trying to pull it out), simply cut the hose cleanly right behind the coupler.

Step 16:
Pull the two vacuum pump hoses together down towards the ground to remove them from the Jeep. Most of it will not be used any more.
Separate the check valve and quick disconnect from the vacuum pump line.

Step 17:
This is the section that will be reused.

Step 18:
Secure the vacuum pump to your new aftermarket bracket and sat it near it’s final location, next to the upper fender bolts.

Step 19:
Using the two tree clips on the wiring harness as template, mark and drill two 7/32 inch holes in the plastic ABS cover. Do not attach the plug into the holes yet.

Step 20:
Measure and cut about 4 feet of 18-gauge wire and insert it into wire loom.

Step 21:
Route the wires down the fender well next to the washer fluid bottle. Make sure the loom with wires does not go around any moving parts.

Step 22:
Connect your new “extension” wires to the stock vacuum pump wiring. Pay attention to colors. Match red with green, and black wires together. Strip back the wires and connect using heat shrink butt connectors. Crimp and heat the connectors to provide a water tight seal.

Step 23:
Pull the loom over the connectors and reinforce with electrical tape.

Step 24:
Secure the wire loom with zip-ties in a couple of spots down by the bumper and inside the fender well.
Remove fender support bolt from the computer mounting bracket and route the wire loom below the bracket. You can gently lift and push the bracket to allow the loom to fit into a small slot below the bracket, so that the wires don’t get pinched. Reinstall the computer mounting bolt.

Step 25:
Cut the “extension” wire and loom to length and connect the wires to the stock plug. Again, pay attention to colors. Match red with green, and black wires together. Strip back the wires and connect using heat shrink butt connectors. Crimp and heat the connectors to provide a water tight seal.

Step 26:
Pull the loom over the connectors and reinforce with electrical tape if necessary.

Step 27:
Reconnect the electrical harness and push it into the two holes in the plastic ABS cover.

Step 28:
Push the vacuum pump line quick disconnect back into the pump and secure the green retainer clip. Twist the vacuum pump line near the engine oil filler cap so that it faces the new location of the pump and connect the check valve to it.
Optional: you can reinstall the small exhaust hose to the vacuum pump and route it towards the back of the engine bay and along the fire wall using some zip-ties. This hose is however not necessary when installing the pump in this high location.

Step 29:
With the vacuum pump relocated you can reconnect the battery and begin removing the bracket. It is welded to the inside of the frame rail so inspect it closely and select the best locations to make cuts.

Step 30:
Using a Dremel or similar tool, make the cut in the front.

Step 31:
Make the cut in the back. You may need a pry bar to completely remove the bracket.

Step 32:
After you remove the bracket, make sure you clean the area and spray paint the exposed metal to prevent rusting.

Congratulations, you are now ready to start installing you new winch bumper!