
Jeep JK Front and Rear Driveshaft by Adams Driveshaft
0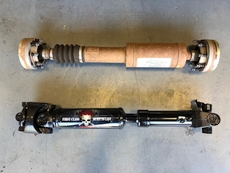 Lifting your Jeep Wrangler JK results not only in higher ground clearance, better approach, departure and break over angles and ability to put on larger tires, but it also causes changes to your driveline as well as steering geometry. Make sure you educate yourself on this topic before installing a lift on your Jeep, especially anything over 3″.
Lifting your vehicle will cause your front and rear driveshafts to operate at different angles, as well as your axles to rotate. It will result in rolling your differentials upwards, causing changes to the caster/pinion angle in the front, and pinion angle in the rear. All these angles are carefully set in stock Jeeps and the original parts installed guarantee smooth operation and ride quality. Installing a lift messes with all these aspects and you need to make sure that everything works together as close to perfect as possible. Stock driveshaft is too short to handle suspension travel and might break under stress. It’s also not designed for larger, heavier tires.
I did realize at the time I was installing my new lift that I would need new driveshafts, however my plan was to replace them a couple of months after the lift, since I was not going to wheel my Jeep during that period (middle of Arizona summer). I knew that especially the stock front driveshaft is vulnerable while operating at higher angles, and might possibly be coming in contact with the exhaust cross pipe (I did install an exhaust spacer during lift installation, however I always considered it a temporary fix). My assumption was that city driving will not result in any issues.
Unfortunately I was wrong.
A stock Jeep JK front driveshaft includes a RZeppa joint on the transfer case side, and a single U-joint on the differential/pinion side. This low angle stock RZeppa joint is not designed for a lifted Jeep. The rubber boot protecting the joint will get damaged by the driveshaft, even during daily driving, for example going over speed bumps. This rubber boot keeps the grease in the joint from coming out.
The way my Jeep let me know that the front driveshaft needs immediate replacement was quite unnerving. I was driving topless and doorless, and one day after my morning commute to work, after parking and turning the ignition off, dark smoke began to come out from underneath the Jeep.
I have never seen that before…
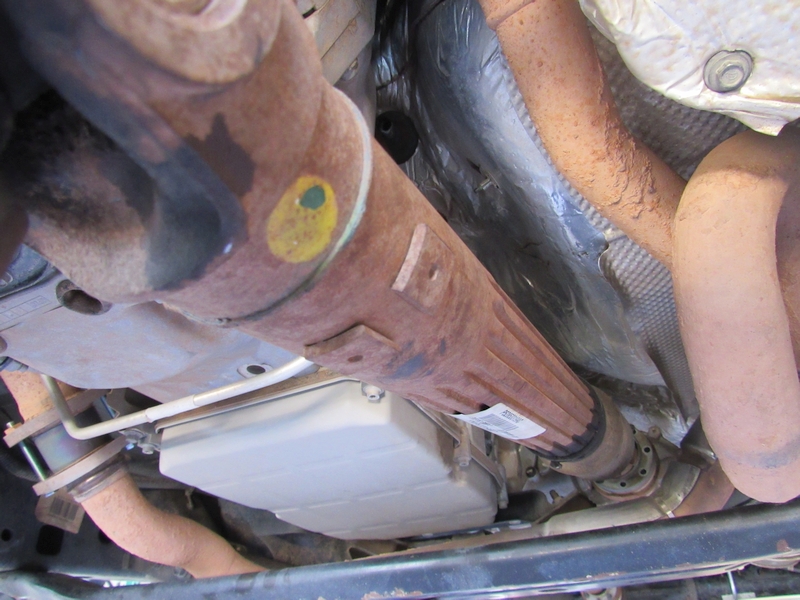
I immediately started to look for the source of the smoke, and came to find out that the rubber boot was completely destroyed, which caused the grease to splatter all over different parts including the exhaust pipe. The heat of the pipe resulted in the grease smoking. Luckily it didn’t cause a fire. After returning home that day, I removed the driveshaft and spent couple hours cleaning the undercarriage to remove all the grease.
That experience prompted my purchase of replacement driveshafts sooner than I had planned. I decided to buy both front and rear driveshafts to take advantage of a package deal. The rear stock driveshaft will however work fine for a while after lifting the Jeep, provided the pinion angle is properly set.
Choosing an aftermarket driveshaft comes down to your personal preference. Do your own research and read comments and reviews on the Jeep forums. Depending on your rig and your driving style, you’ll need to also decide on the U-joint size, choosing between 1310 and 1350 series driveshafts. Both 2-door and 4-door JK’s have the same length front driveshaft, the rear is of course different. I would highly recommend that you visit the manufacturers’ websites for instructions on measuring and determining the correct length of the rear driveshaft, and calling them if you have any questions.
Two most highly regarded driveshaft manufacturers are Adams Driveshaft and Tom Wood’s Custom Drive Shafts.
Both manufacturers offer double cardan driveshafts. This design is considered to be a much better option for lifted Jeeps. These driveshafts are also commonly called CV driveshafts. Most in the Jeep community use the terms double cardan and CV to mean the same thing. They are really referring to the double cardan style shaft with two u-joints and a centering ball on the transfer case end and a single u-joint on the differential end. Both the Rzeppa joint and Double-Cardan joint are types of CV joints.
CV joint means constant velocity joint, meaning that it theoretically does not change speed as it rotates through it’s range of motion when operated at an angle.
In this post, I will attempt to describe installation of Adams Driveshaft Jeep JK front and rear driveshaft which I purchased to replace my stock driveshafts, following a lift install on my 2 door JK. Prior to the installation, I reviewed all available instructions online and watched several videos. Check out this video for example, showing the installation process.
Disclaimer: Like I always mention I am not a professional mechanic, I just try to do as much work on my Jeep as possible. It helps me learn more about my vehicle and save some money that can be spent on parts and upgrades. I take no responsibility for any injury or breakage which might occur if you decide to follow these steps. You have to decide if you’re comfortable working on your Jeep. If you’re not, please have a professional complete this project for you.
As an Amazon Associate I earn commission from qualifying purchases. It allows me to offer contents of this website free of charge to everyone.
Parts and tools needed:
1. Adams Driveshaft Jeep JK Front & Rear 1310 CV driveshafts
4. 5/16″ Socket, 3/8-inch Drive, 6-point
6. 15mm Socket, 1/2-inch Drive, 6-point
7. 1-1/4″ Socket, 1/2-inch Drive, 6-point and 1-5/16″ Socket, 1/2-inch Drive, 6-point
10. 1/2-Inch Drive Torque Wrench (25-250 ft lbs.)
13. RTV Silicone and Red Loctite Threadlocker
Procedure:
Step 1:
Prepare your tools and get everything ready before you start the project. Park your Jeep on a level surface, apply emergency brake and put your transmission in park or in gear if you have a 6-speed manual transmission. Chock the wheels.
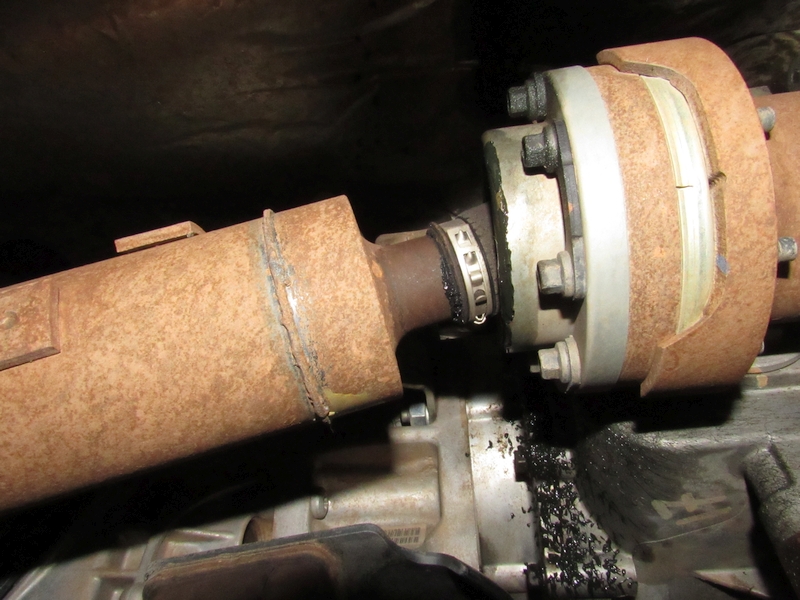
Here is a photo of my stock front driveshaft with damaged rubber boot protecting the RZeppa joint, resulting in grease being splattered all over the place as the shaft was spinning.
Step 2:
First you will need to take out the old OEM front driveshaft. Start by disconnecting the driveshaft from the transfer case flange. Remove all eight bolts using a 5/16″ wrench, or an impact with a 5/16″ socket on it.
Helpful TIP: Whenever you want the front driveshaft to spin freely, put your Jeep into 2-wheel drive. When you don’t want the shaft to spin, put the Jeep into 4-wheel drive.
Step 3:
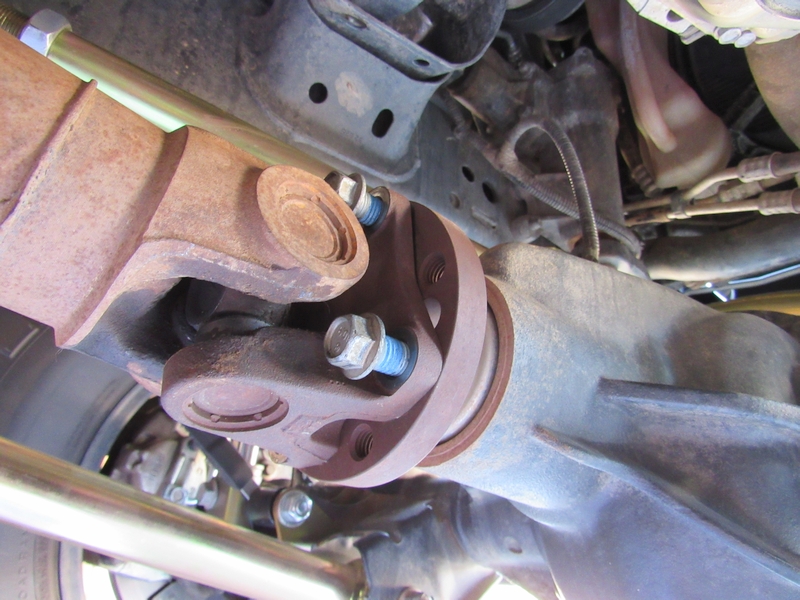
Disconnect the front of the driveshaft from the pinion flange. Remove all 4 bolts, using a breaker bar with a 15mm socket on it.
Step 4:
Using a hammer and a small punch, separate driveshaft from the t-case flange, taking advantage of the punch holes in the flange.
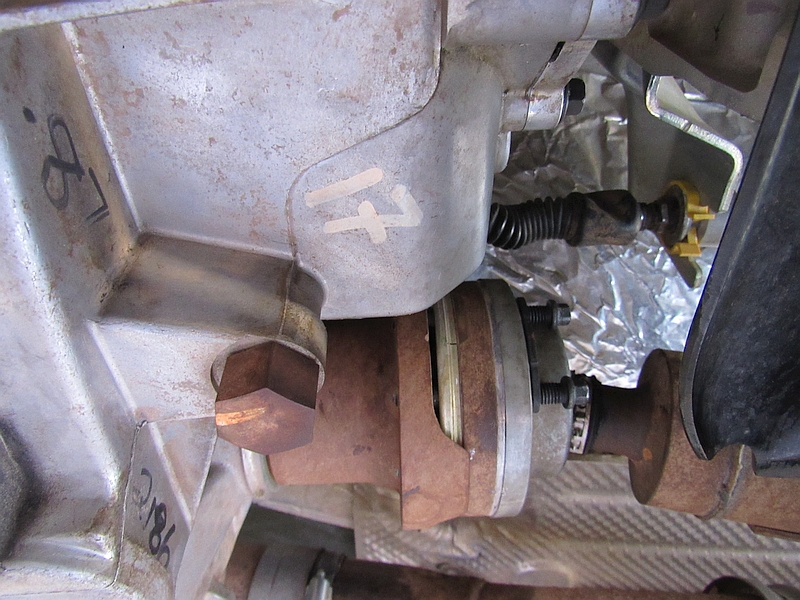
Step 5:
Using all three punch holes around the flange will help with more even separation of the driveshaft.
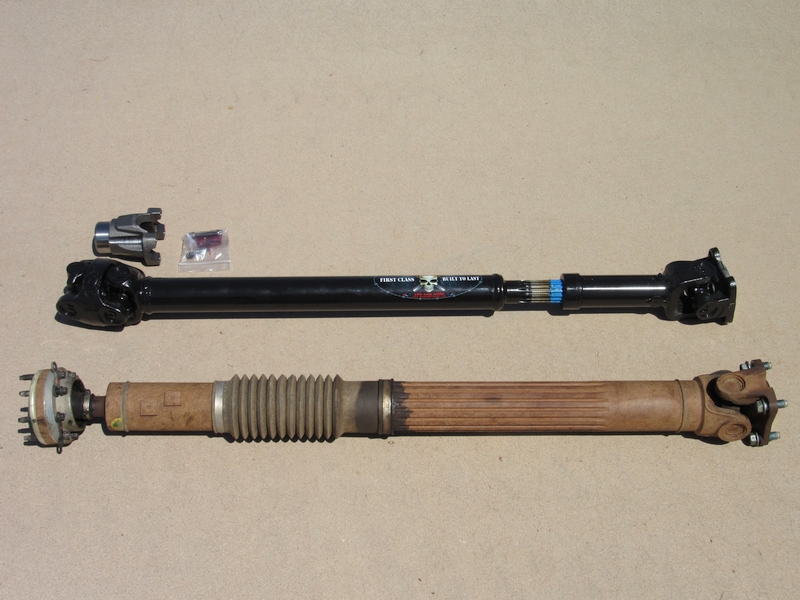
Step 6:
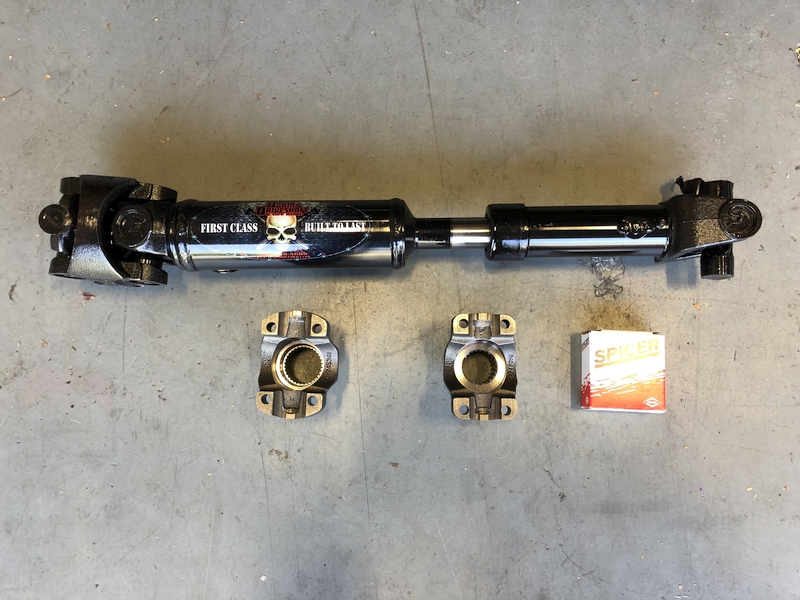
Pull the stock front driveshaft out of the Jeep. You can see the difference between the factory driveshaft and the heavy duty one. Aftermarket driveshaft has smaller outside diameter even though it’s much stronger and it weights a little more. The stock front driveshaft comes in at 19.2 lbs, and the Adams Driveshafts one weights 20.5 lbs.
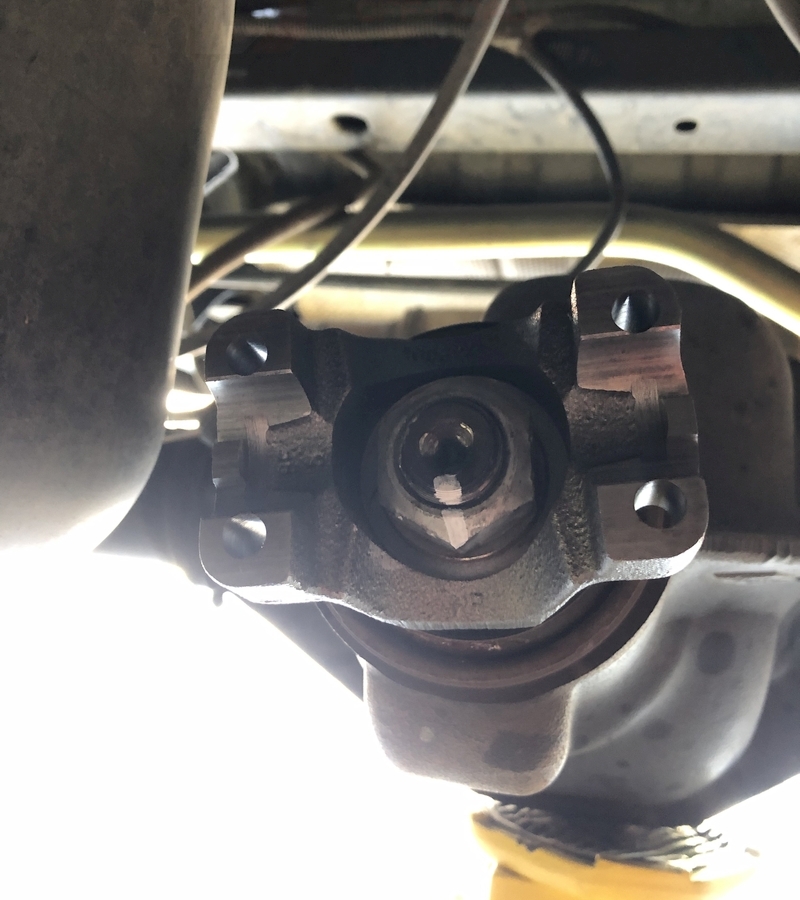
Step 7:
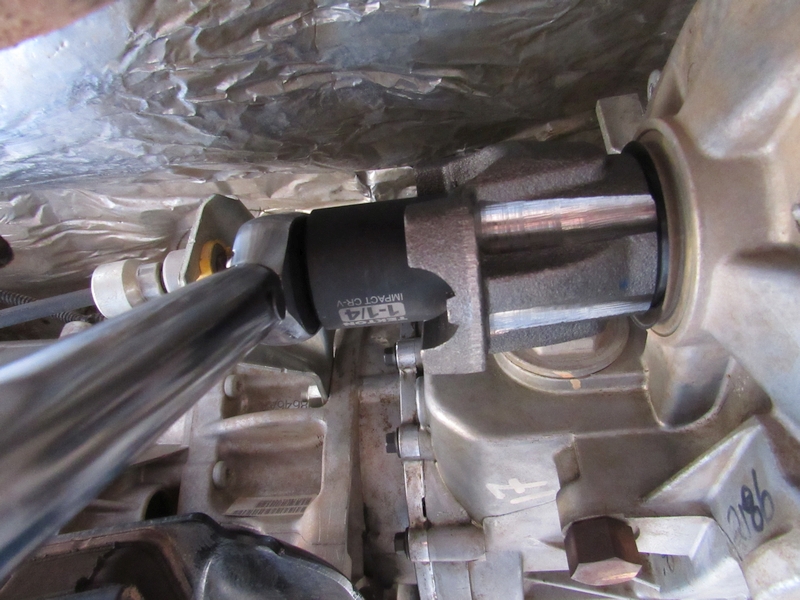
Remove the front transfer case nut, using a breaker bar and 1-1/4″ socket.
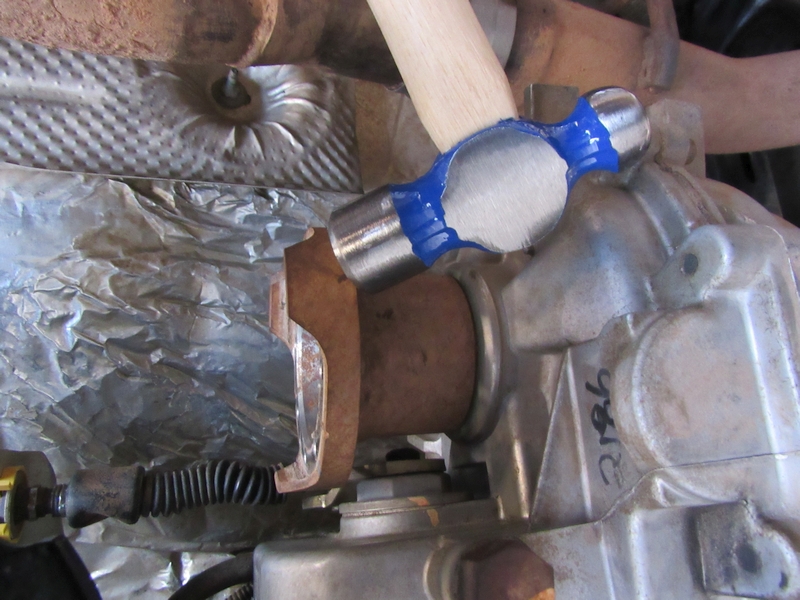
Step 8:
Tap the flange off with a ball peen hammer.
Step 9:
Remove the rubber o-ring from factory flange.
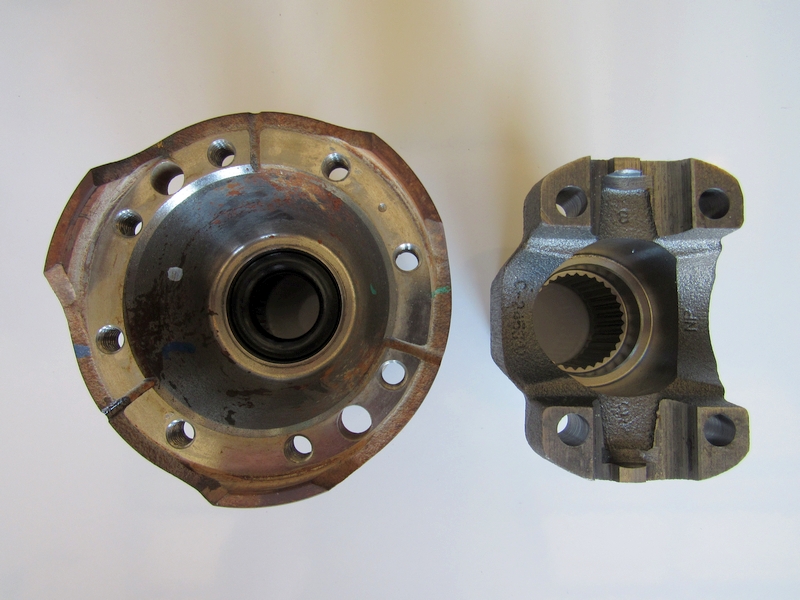
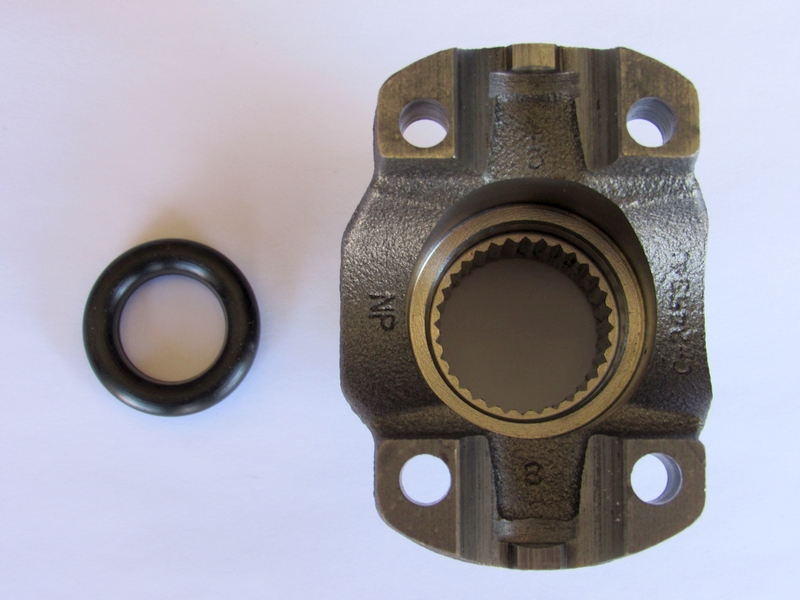
Step 10:
Place the o-ring inside the new front t-case yoke.
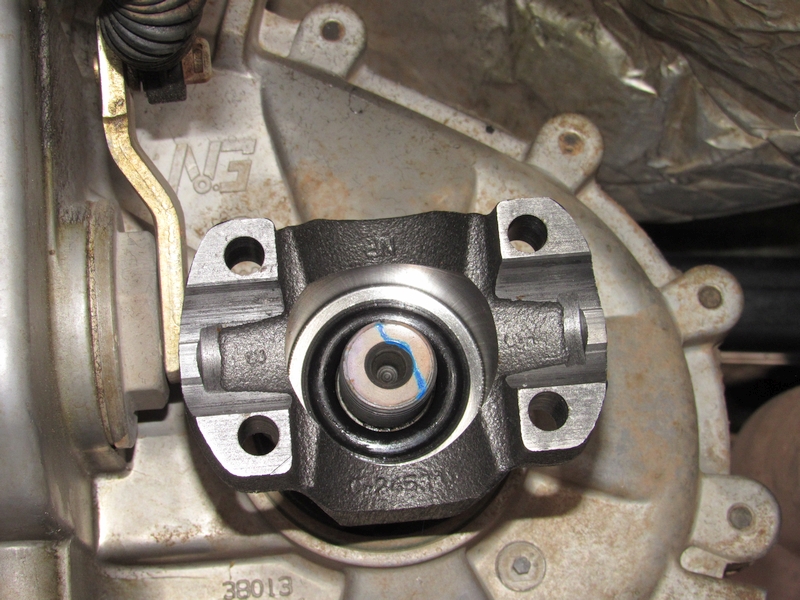
Step 11:
Place the yoke on the front t-case output shaft.
Step 12:
Put a bead of RTV on the washer of the transfer case nut and put some red Loctite on the threads of the nut. Thread the nut onto the output shaft.
Step 13:
Tighten the transfer case nut with a torque wrench to 160 ft lbs. Make sure you have a torque wrench that goes that high. A lot of even the 1/2 in. drive wrenches max out at 150 ft lbs. You can always rent a torque wrench at your local auto parts store.
If the transfer case nut is not tight enough, you will experience vibrations.
Step 14:
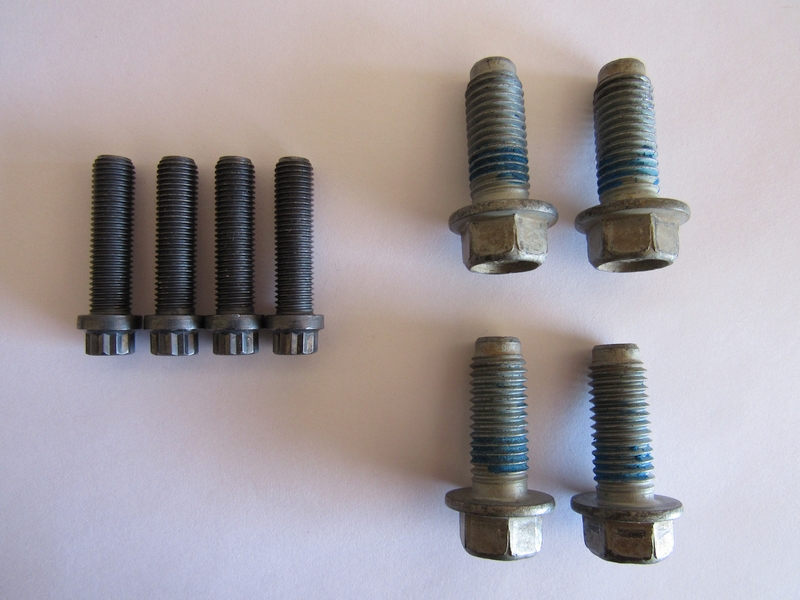
Apply red Loctite to the new 5/16″ head bolts that came with the driveshaft package, as well as the factory 15mm bolts.
Step 15:
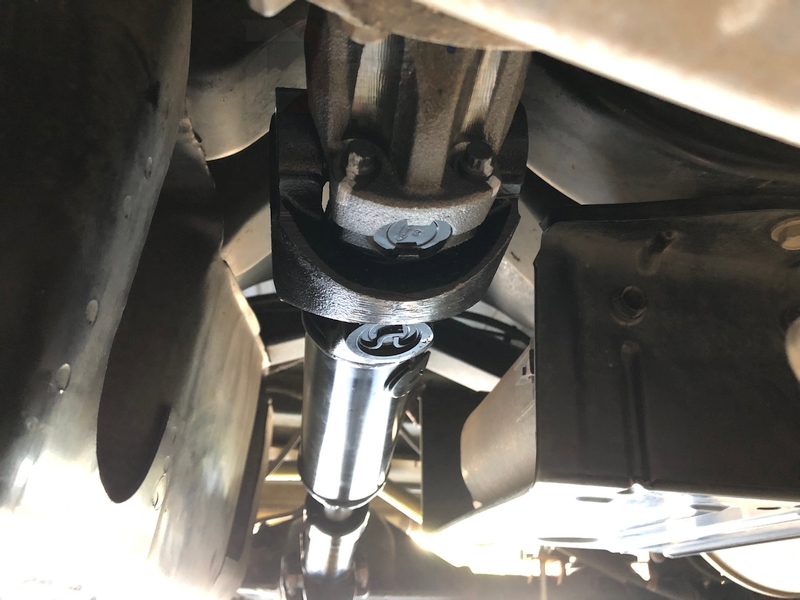
Slide the double cardan end of the driveshaft into the t-case yoke and screw the bolts in, from the back side of the yoke. Tighten the bolts using a 5/16″ 12 point wrench. There is no torque specs for these bolts, so use your judgement (factory spec for the original 8 bolts is 15 ft. lbs, but you will not be able to fit a torque wrench here).
Step 16:
Making a wrench extension from a pipe will help tighten these bolts.
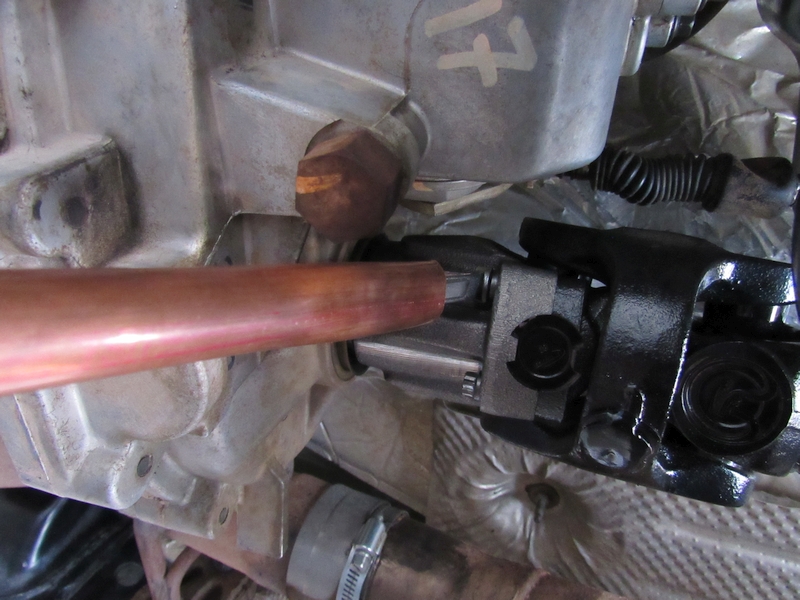
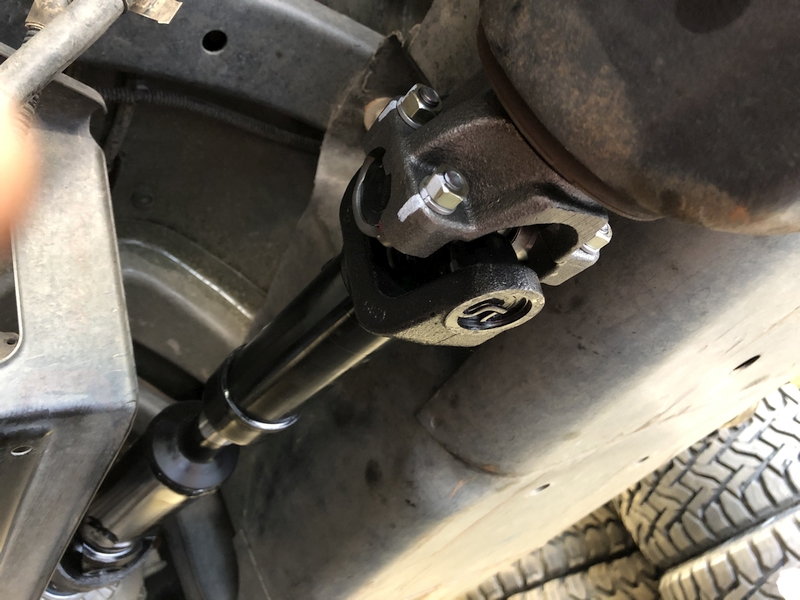
Step 17:
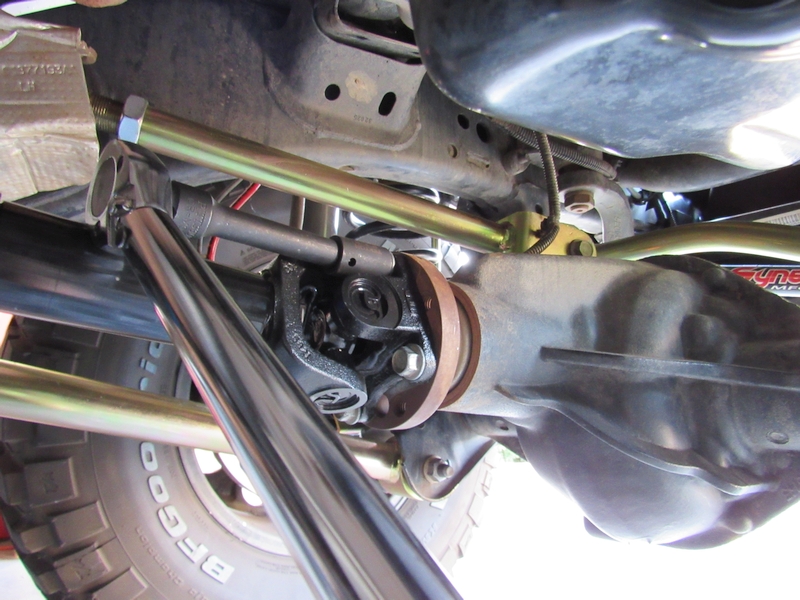
Connect the front end of the driveshaft to the factory pinion flange, using the stock 15mm bolts. With a torque wrench, tighten these bolts down to 80 ft lbs.
Now it’s time to take out the old OEM rear driveshaft, and replace it with your brand new aftermarket heavy duty driveshaft.
Step 18:
Start by disconnecting the driveshaft from the rear transfer case flange.

Step 19:
Remove all eight bolts using a 5/16″ 6 point end wrench, or an impact with a 5/16″ 6 point socket on it. Using a hammer and a small punch, separate driveshaft from the t-case flange, taking advantage of the punch holes in the flange, just like with the front.
Next, remove all 8 rear pinion flange bolts using the same 5/16″ 6 point end wrench, or an impact with a 5/16″ 6 point socket on it. The rear pinion flange has holes in the back (facing the rear differential), with more difficult access. Use a hammer and a short punch to separate the shaft from the flange.
Pull the stock rear driveshaft out of the Jeep. You can see the difference between the factory driveshaft and the heavy duty one. Aftermarket driveshaft has smaller outside diameter even though it’s much stronger.

Step 20:
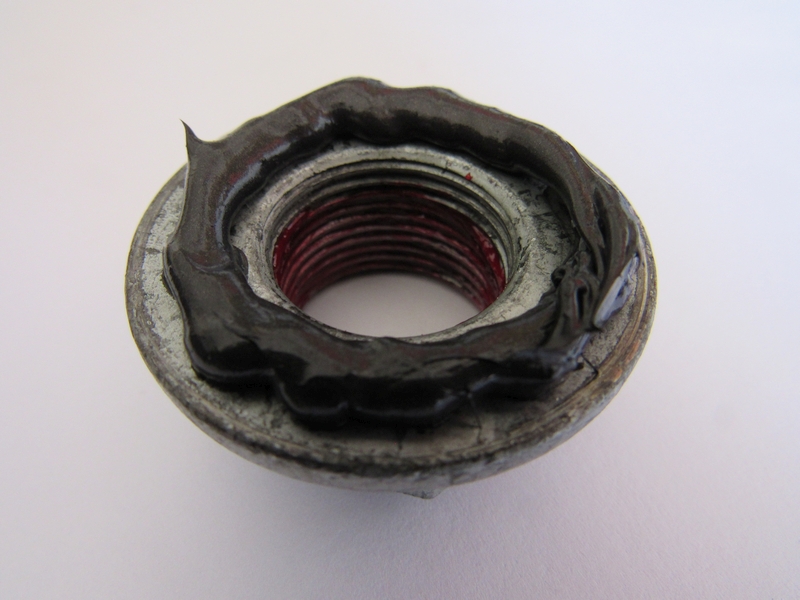
Remove the rear transfer case nut, using a breaker bar and 1-1/4″ socket.
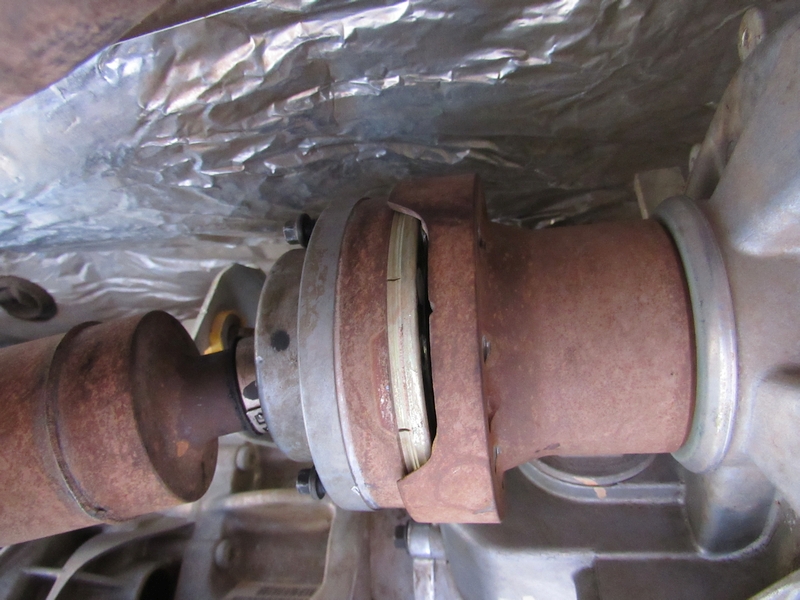
Tap the flange off with a ball peen hammer.
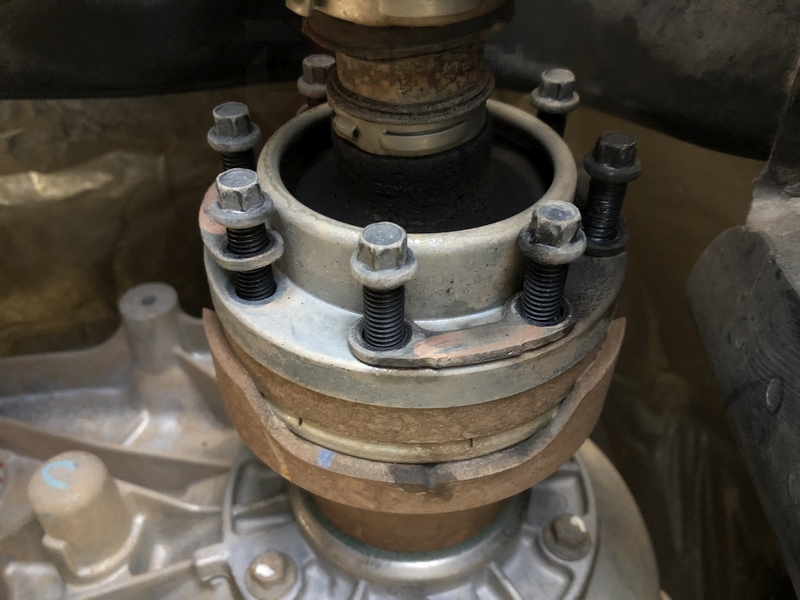
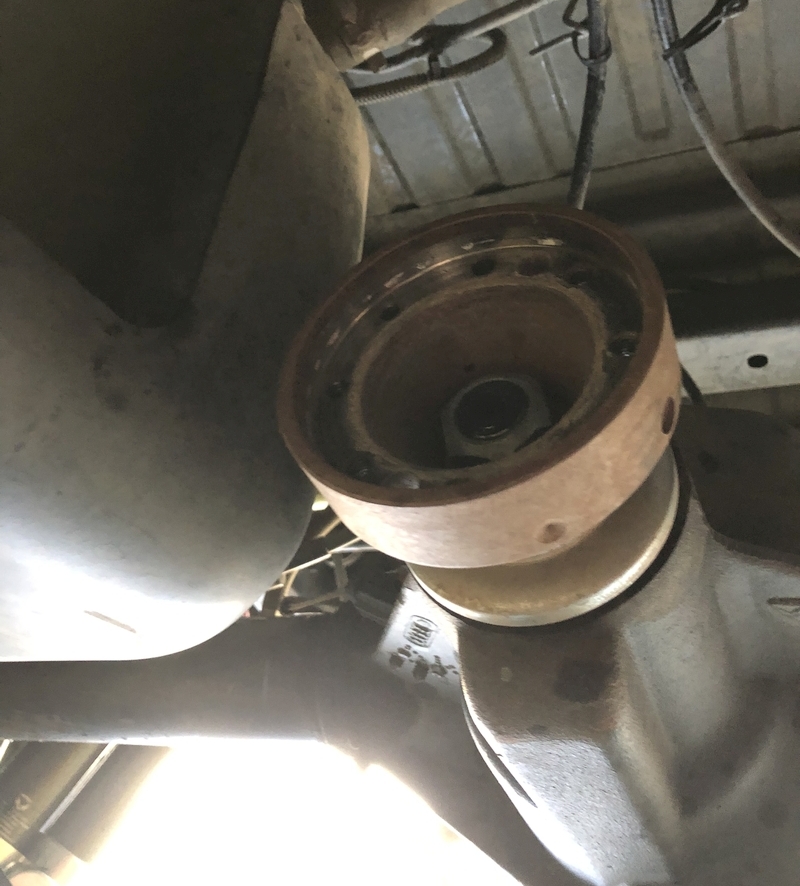
JK models with a vibration damper installed (a large steel ring around the flange) might need a puller to remove the flange (you can rent one from AutoZone or other auto parts store), although tapping the flange with a hammer might just do the job.

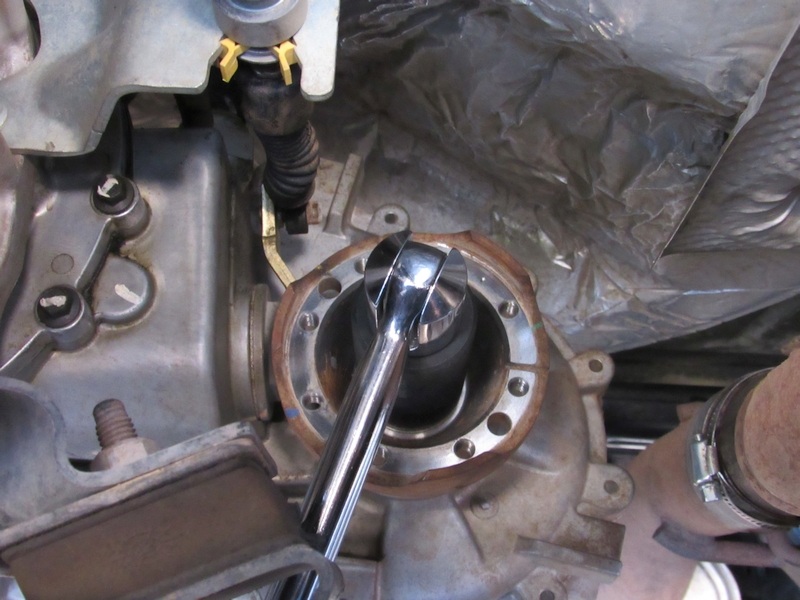
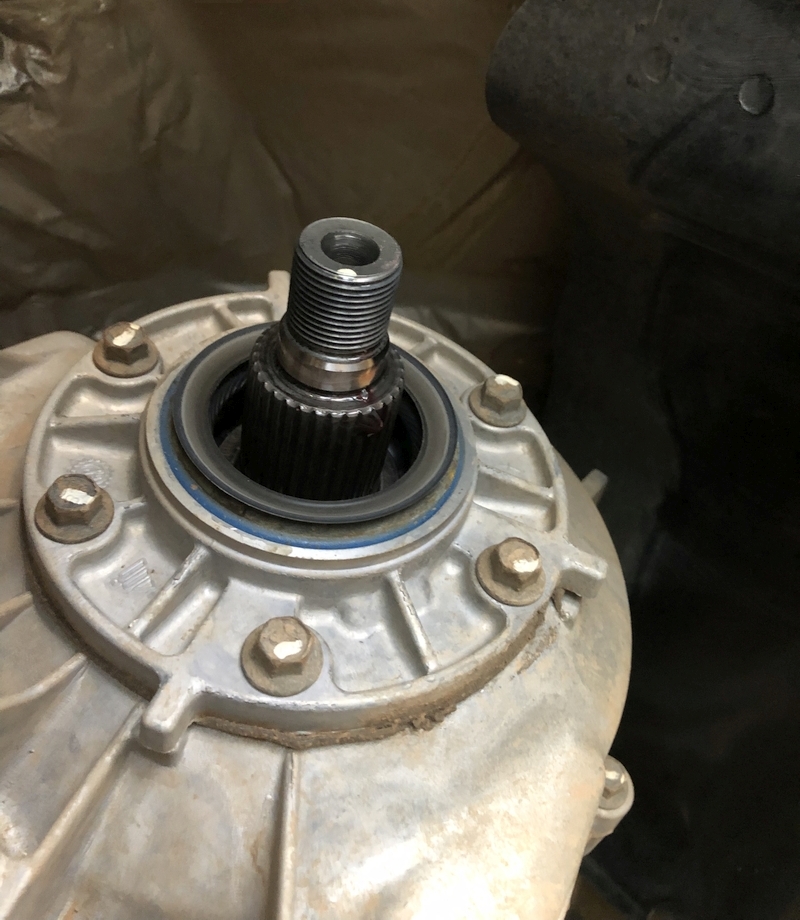
Closeup of the rear t-case output shaft. Inspect to make sure all the splines and threads are in good shape.
Step 21:
Remove the rubber o-ring from factory rear t-case flange. Place the o-ring inside the new rear t-case yoke. Place the yoke on the rear t-case output shaft. Put a bead of RTV on the washer of the transfer case nut and put some red Loctite on the threads of the nut. Thread the nut onto the output shaft. Tighten the transfer case nut with a torque wrench to 160 ft lbs. If the nut is not tight enough you will experience driveshaft vibration.
Step 22:
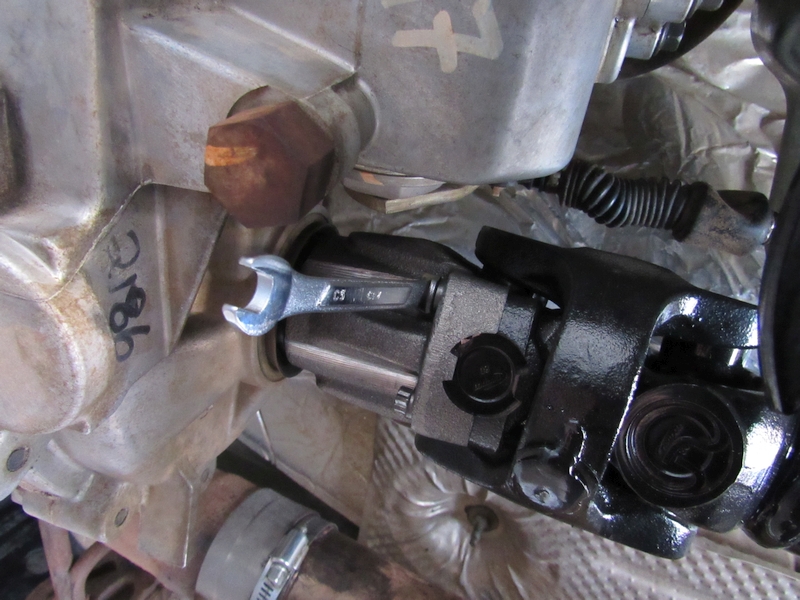
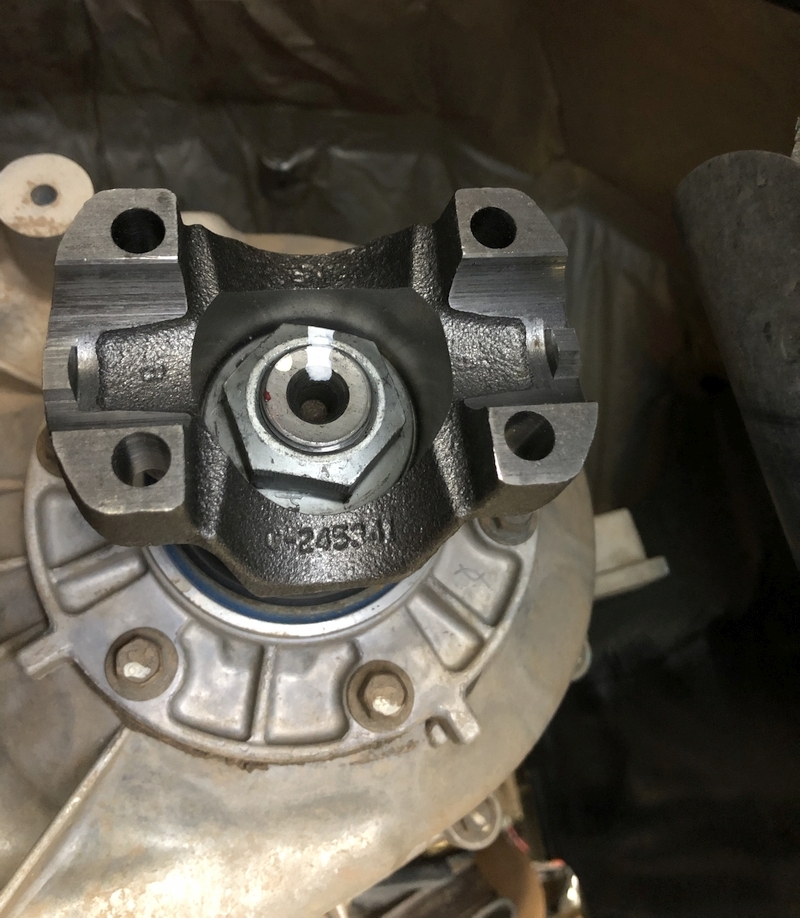
Remove the rear pinion nut, using a breaker bar and 1-5/16″ socket.
Tap the flange off with a ball peen hammer. I found it helpful to place one hammer against the flange and tap it with another hammer. Hit the flange from the top and from the bottom. Make sure to save the stock pinion nut washer.
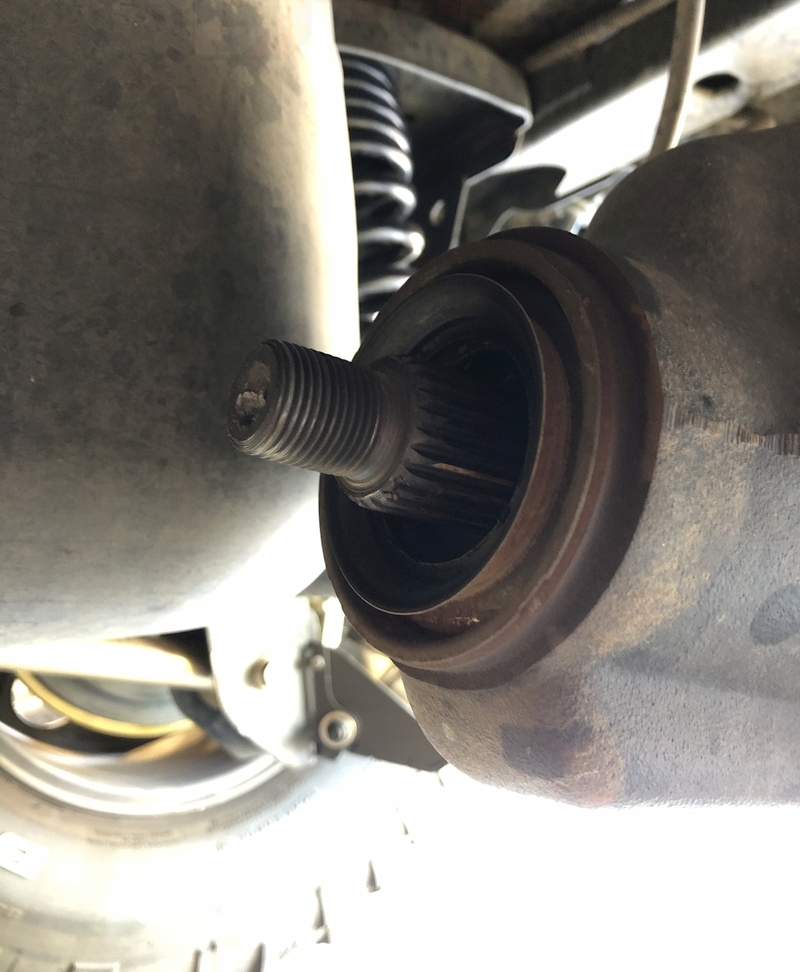
Closeup of the rear pinion shaft. Inspect to make sure all the splines, threads and pinion seal are in good shape.
Step 23:
Slide the new yoke on the rear pinion shaft. Put a bead of RTV on the stock washer and put some red Loctite on the threads of the pinion nut. Install the washer on the pinion with the RTV facing towards the differential. Thread the nut onto the pinion shaft.
Tighten the nut, but make sure you don’t over tighten it or crush the pinion sleeve beyond factory specs (160-200 ft lbs). You’re looking for the same pre-load as the factory flange, before you removed it. Tightening a small amount and checking the amount of play each time is the safest approach.
Check to make sure that there is no play in or out, or up and down on the pinion yoke. If there is some play then the yoke has not been tightened down to the crush sleeve yet. Continue tightening until there is no movement in the yoke in or out, or up and down.
If you keep tightening the nut you will over crush the crush sleeve and the pinion bearings will burn up.
Step 24:
Apply red Loctite to the new 5/16″ head bolts that came with the driveshaft package.
Slide the double cardan end of the driveshaft into the t-case yoke and screw the bolts in, from the back side of the yoke. Tighten the bolts using a 5/16″ 12 point wrench. There is no torque specs for these bolts, so use your judgement (factory spec for the original 8 bolts is 15 ft. lbs, but you will not be able to fit a torque wrench here).
Making a wrench extension from a pipe will help tighten these bolts.
Step 25:
Remove the black tape off of the rear u-joint. Be careful not to drop the cap off the u-joint.
Slide the rear u-joint into the pinion yoke making sure that both u-joint caps are sitting between the tabs on the yoke.
Install the provided u-bolts, making sure you place lock washers under the nuts.
Tighten down the u-bolts with a 1/2″ open end wrench. Make sure that when you are tightening down the u-bolts you tighten them down evenly. Tighten the nut down until it feels snug, then go a 1/4 of a turn and that’s tight enough. The lock washer will hold the nut tight.
If you over tighten the u-bolts, or tighten them unevenly, the u-joint will fail and could cause the driveshaft to come out.
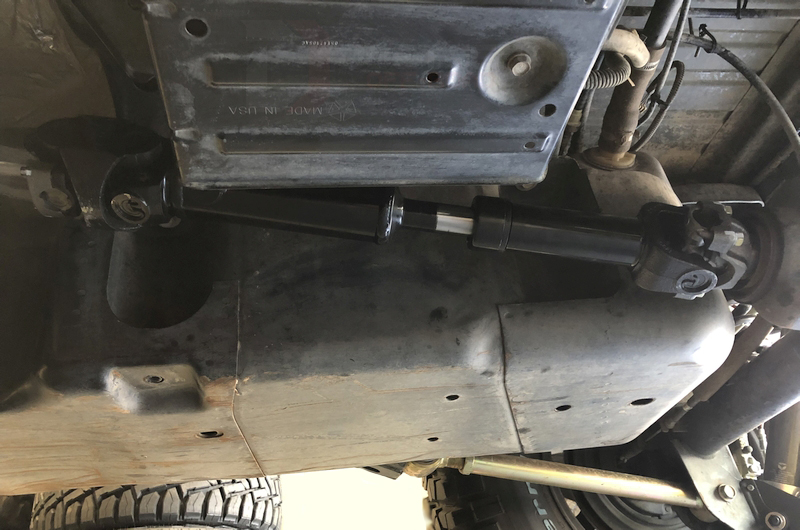
You have now finished the installation of your new heavy duty driveshafts. These are some of the strongest driveshafts on the market, and made with the best components by Spicer and Neapco.
If you have any questions or suggestions, feel free to comment below.
Disclosure: AZoffroading.com is a participant in the Amazon Services LLC Associates Program, an affiliate advertising program designed to provide a means for sites to earn advertising fees by advertising and linking to Amazon.com.