Jeep JK Tailgate Tire Carrier by Rugged Ridge
0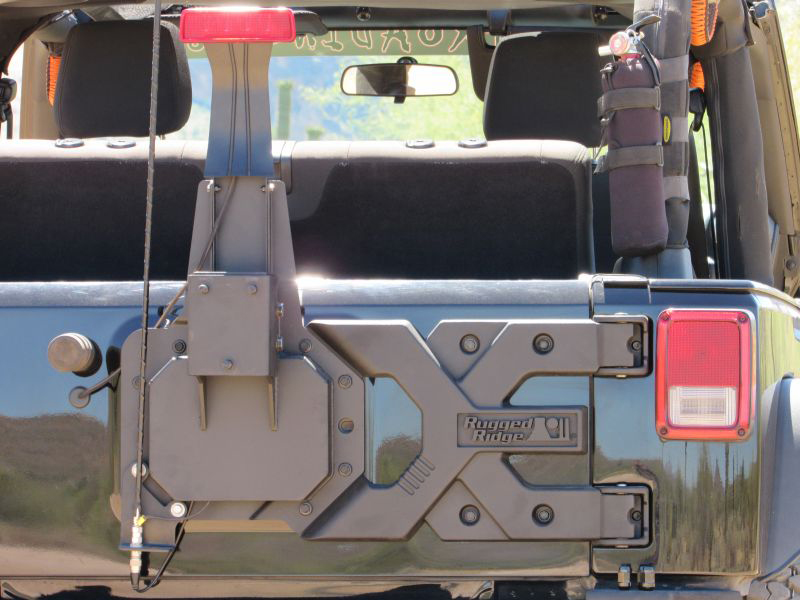 Installing a suspension lift on your Jeep Wrangler is one of the most exciting and most common upgrades any Jeep owner can think of. Lifting your Jeep results in higher ground clearance, better approach, departure and break over angles, as well as the ability to put on larger tires. Upgrading your tire size will require a new tire carrier to accommodate both the heavier weight and larger diameter. Factory tire carrier of a Jeep JK is made of thin aluminum and designed to carry a maximum weight of 50 lbs. under normal to light trail conditions. Exceeding that weight limit could cause damage to the tire carrier or even the tailgate itself. The Wrangler’s tailgate is comprised of an outer and inner shell, spot welded on the inside. When more weight is introduced to the tire carrier, it pulls the carrier back, along with the outer shell. Eventually, the force will begin to pop the welds along the inner shell, separating both pieces and causing damage to the tailgate.
Before you install larger tires, you need to consider how you’re going to carry that new full size spare. Similar to most aftermarket parts for the Jeep, there are a variety of tire carrier options available.
The first decision to make is whether you would like to retain the stock look, by running a larger tire on the tailgate itself, with heavy reinforcement, or run an aftermarket rear bumper with an integrated tire mount. Both solutions will solve the two major issues involving weight and clearance.
If you decide to go with the tailgate option, there are several manufacturers of the body mounted tire carriers: TeraFlex, Rugged Ridge, MetalCloak, Rock Hard 4×4, EVO Manufacturing, Barricade, Smittybilt.
This option replaces the factory hinges and tire carrier itself with a heavy gauged robust hinge system. The system no longer relies on the tailgate for support and alleviates any stress on the spot welds. It also allows you to adjust the mounting height in order to take into account larger tires and is rated to carry up to a 37” tire.
Body mounted tire carriers retain your Jeep’s one handed, easy access to the rear cargo area.
Compared to a stock spare tire carrier, which weighs less than 10 lbs, an aftermarket body mounted tailgate tire carrier kit will weigh around 50 lbs.
If you’re looking to upgrade your rear bumper and are looking for an even sturdier solution, than a steel bumper with an integrated tire carrier might be a better option.
This system floats independently from the tailgate, requiring you to first swing open the tire carrier, followed by the tailgate, in order to access the cargo area. This solution however introduces a great deal of weight to the rear of the Jeep, with the bumper often coming in at around 100 lbs. and the carrier itself an additional 50 lbs.
I decided to go with a heavy duty Jeep JK tailgate tire carrier option. This step-by-step write-up describes installation of the Rugged Ridge tire carrier kit. The kit includes the hinge casting, wheel mount with lug plate and brake light extension.
You can also watch these installation videos if you prefer: from CJ Off-Road or Rocky X TV. Be aware however that in both videos, I noticed they forget to install the spacer plates on the driver side of the new wheel mount, or simply fail to mention that it needs to be inserted between the wheel mount and tailgate.
Disclaimer: Like I always mention I am not a professional mechanic, I just try to do as much work on my Jeep as possible. It helps me learn more about my vehicle and save some money that can be spent on parts and upgrades.
I take no responsibility for any injury or breakage which might occur if you decide to follow these steps. You have to decide if you’re comfortable working on your Jeep. If you’re not, please have a professional complete this project for you.
As an Amazon Associate I earn commission from qualifying purchases. It allows me to offer contents of this website free of charge to everyone.
Parts and tools needed:
1. Jeep factory lug nut wrench
2. 19mm AEV lug extension adapter or spline lug nut socket key, depending on your lug nuts
3. breaker bar (optional)
6. 10mm socket
7. 10mm wrench
8. 13mm socket
9. 19mm socket
10. 19mm wrench
11. T-20 Torx bit
12. T-50 Torx bit
13. 6mm Allen bit or wrench
14. 2-3 wooden blocks or shims
17. wire cutter/stripper/crimper (optional)
18. angle grinder (optional)
Procedure:
Step 1:
Prepare your tools and gather all the parts before you start the project.
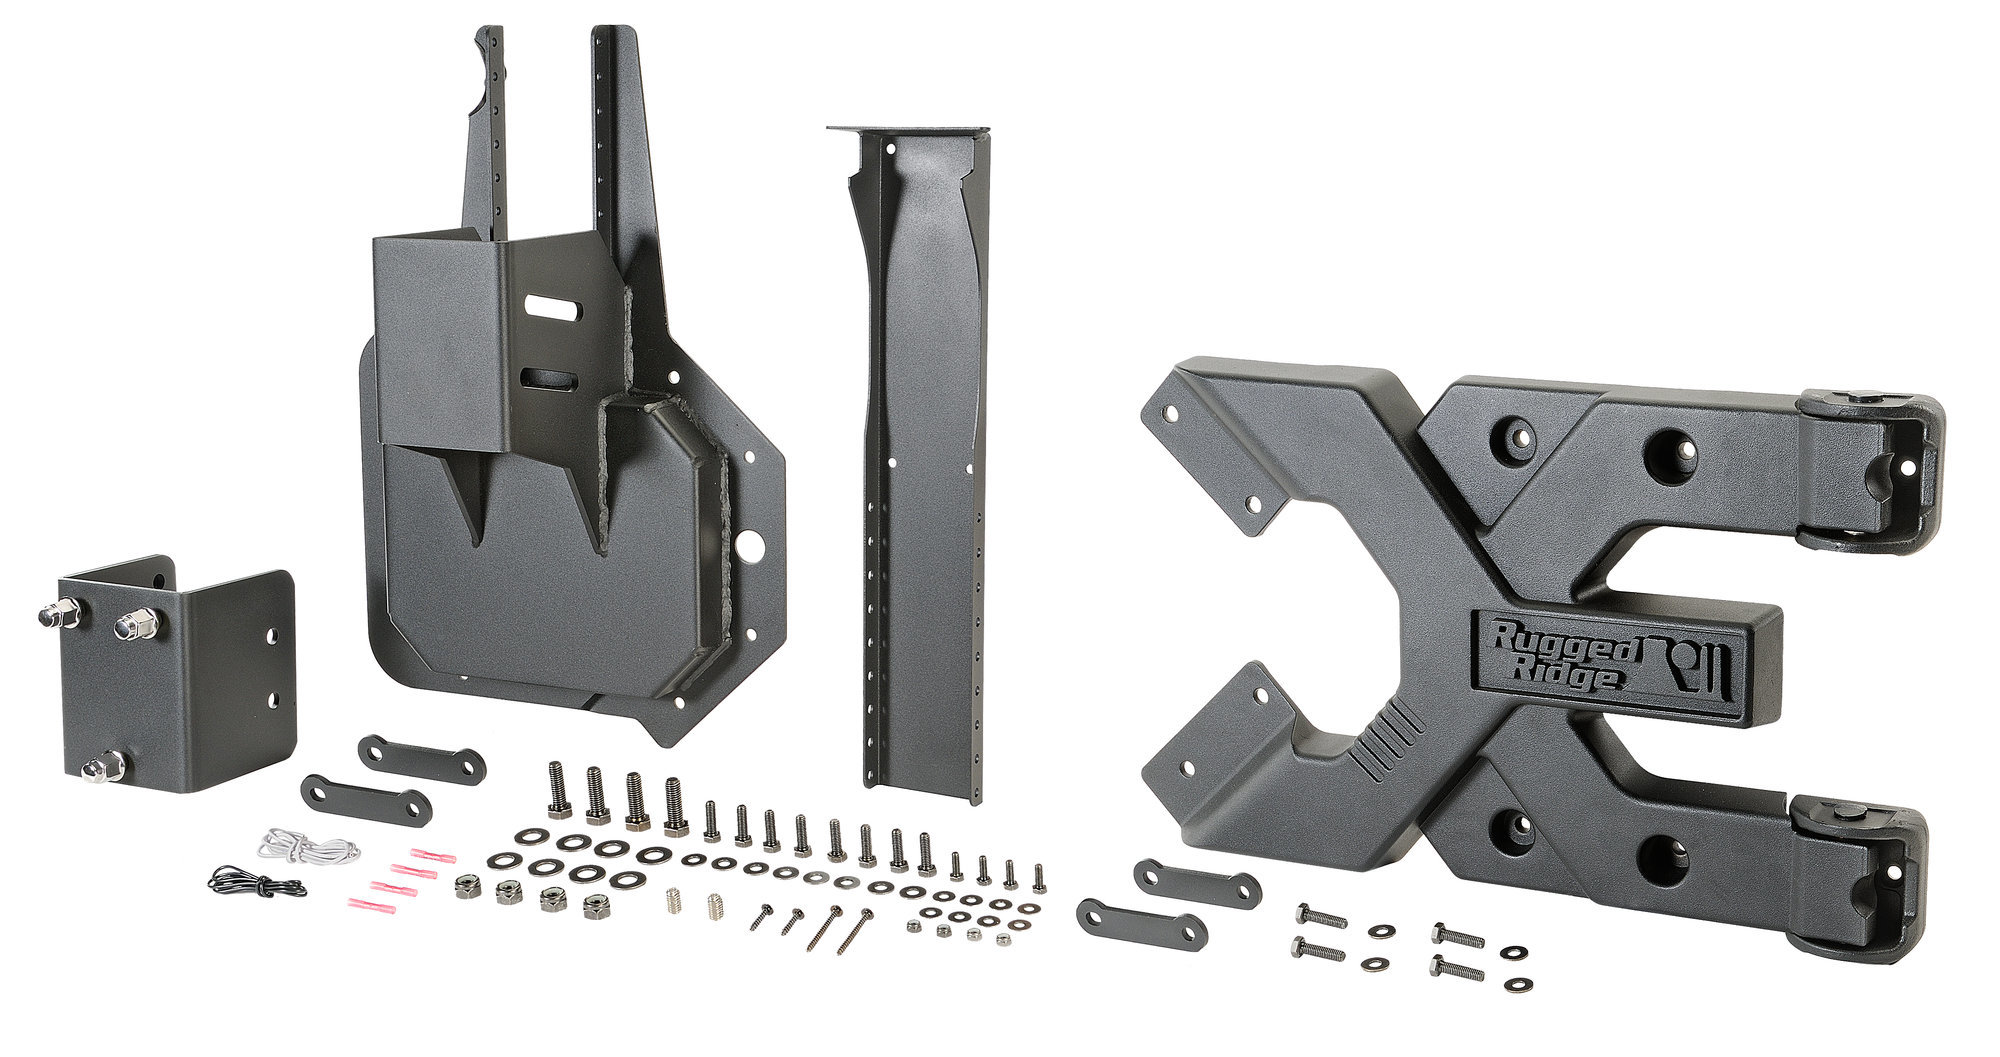
If you purchased the tire carrier KIT, you should have the Hinge Casting, Wheel Mount with Lug Plate, Brake Light Extension, and two sets of hardware.
Step 2:
Park your Jeep on a level surface, apply emergency brake and put your transmission in park or in gear if you have a 6-speed manual transmission. Chock the wheels.
Step 3:
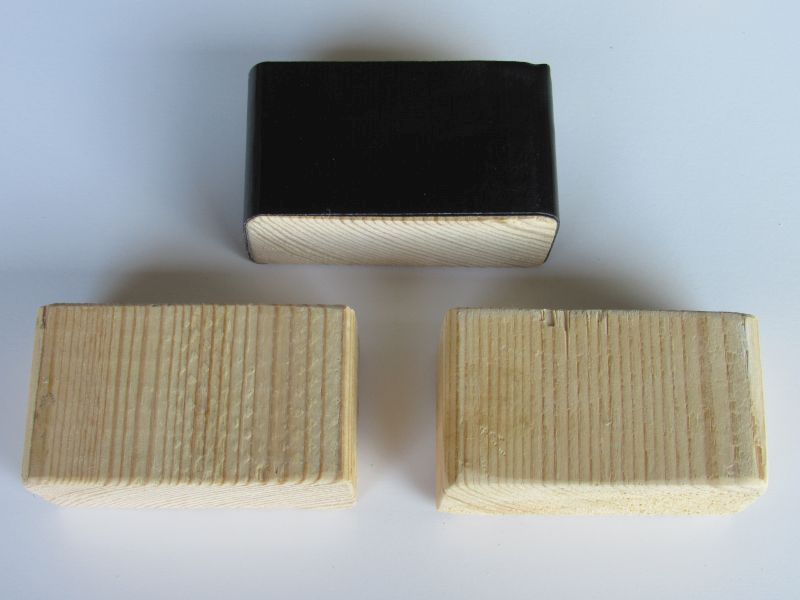
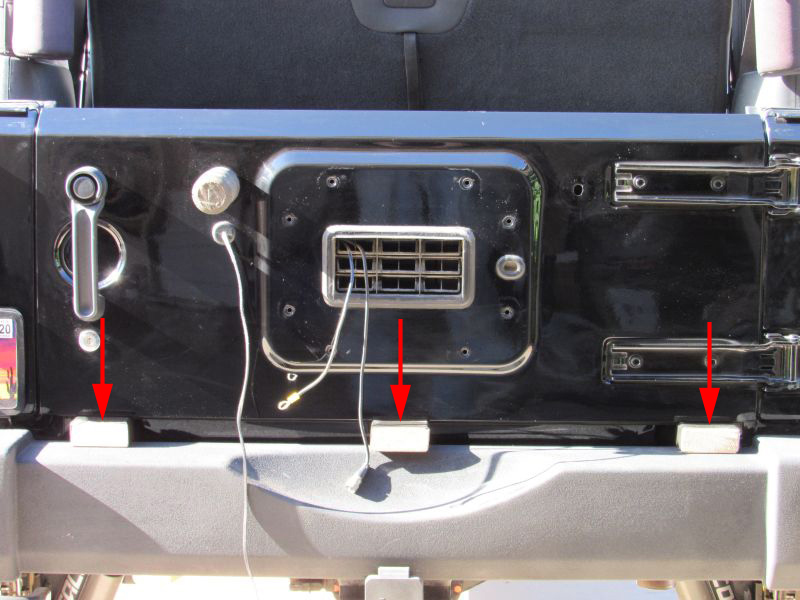
Prepare two or three blocks of wood, to be used as supports for the tailgate. They will hold your tailgate in position when removing stock hinges. If you have a factory rear bumper, you can cut 2″ long pieces of 2×4 lumber (exact dimensions: 1.5″ x 3.5″) and wrap them with duct tape couple of times. If you have an aftermarket rear bumper, take exact measurements and prepare correct size wood blocks or shims.
Step 4:
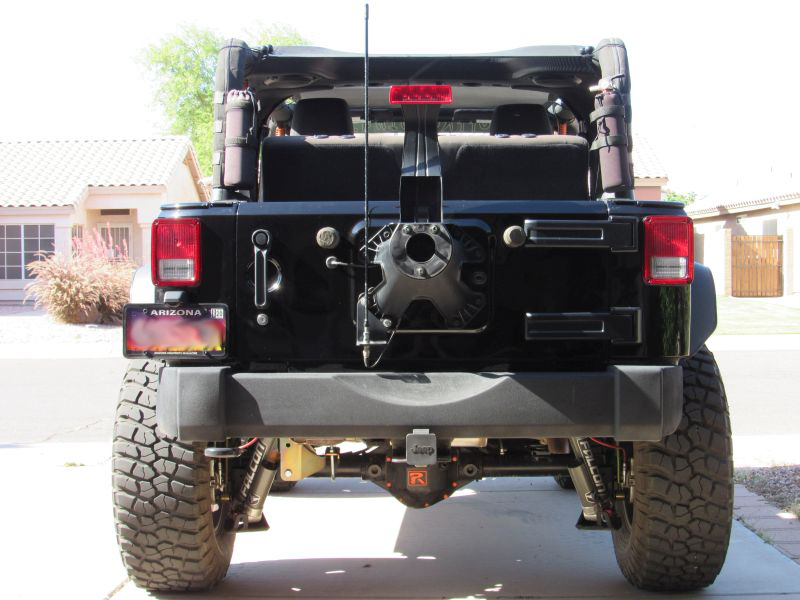
Take off the spare tire.
Step 5:
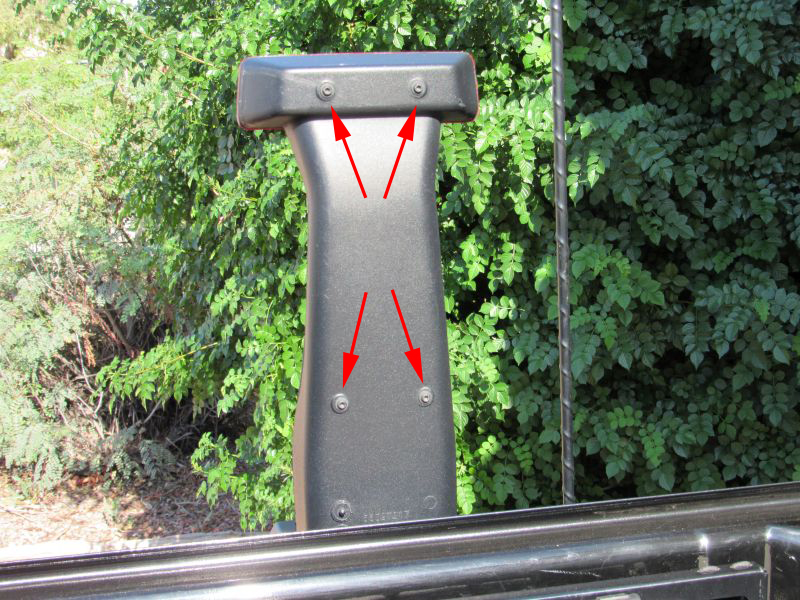
Open the tailgate. Using a T-20 Torx bit, remove 4 torx head screws that attach the third brake light to factory tire mount. Pull light away from tire mount.
Step 6:
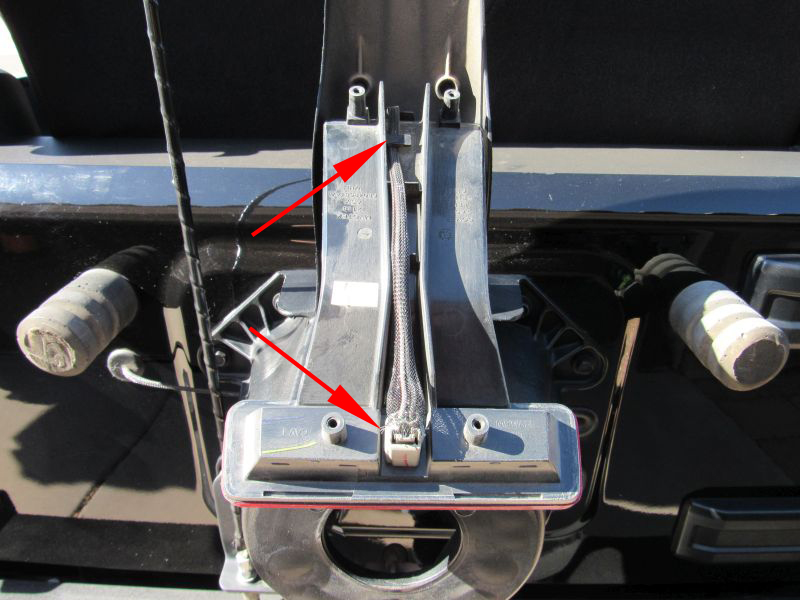
Remove the connector by pushing down on tab and pulling the connector firmly. Release the cable from a clip holding it in place.
Set the light aside, it will be used later during installation. Place the connector and the cable off to the side, to not interfere with tire carrier install.
Step 7:
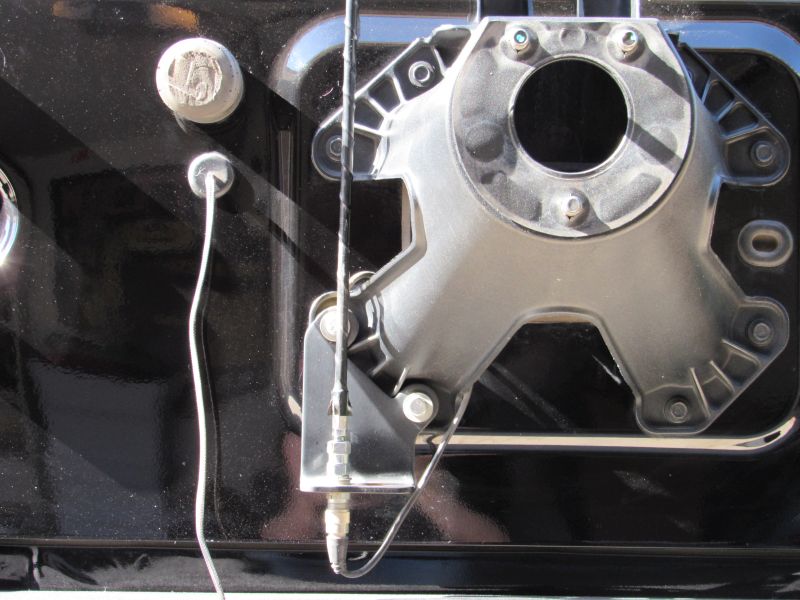
If you have a CB antenna attached to your stock tire carrier with a bracket, remove it at this point.
Step 8:
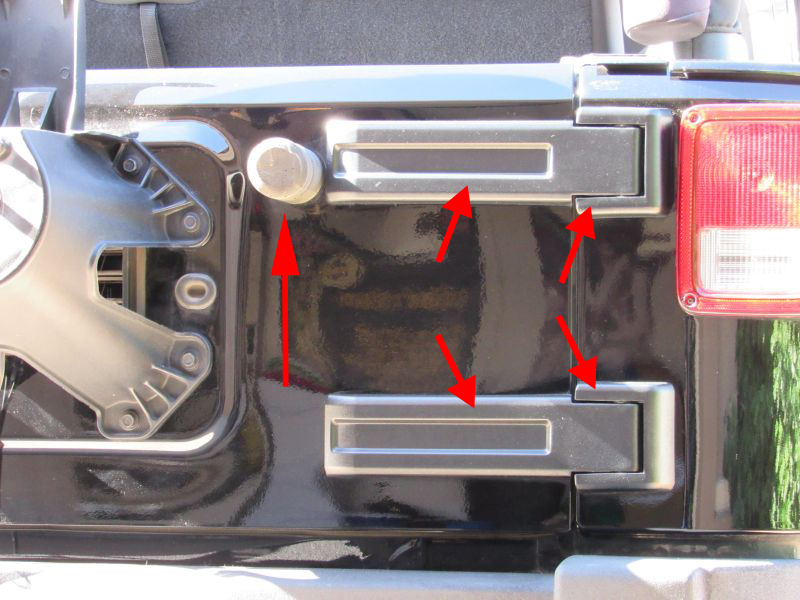
Twist and pull the rubber tire bumper to remove it (from right side of tailgate only).
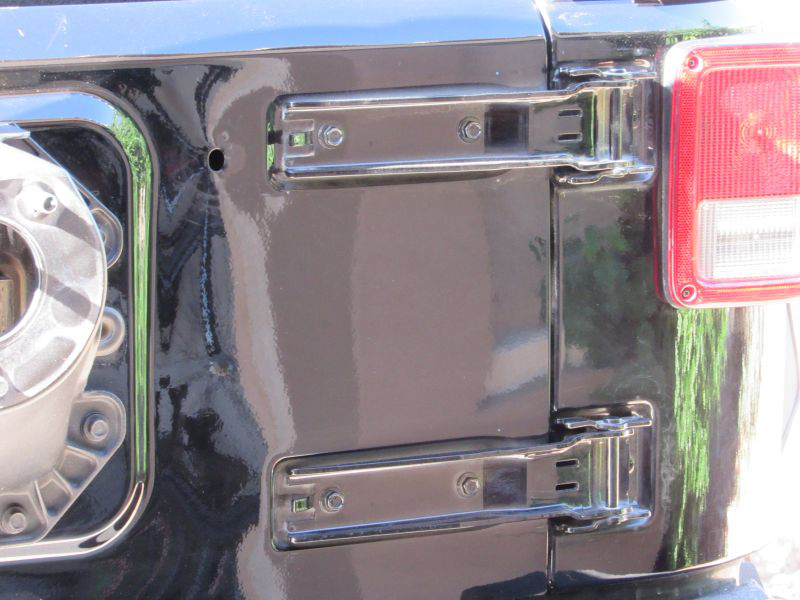
Remove the plastic hinge covers. With the long hinge covers, pull away from the Jeep and to the left. For the smaller plastic covers, pull the lower portion down and away from the vehicle.
Step 9:
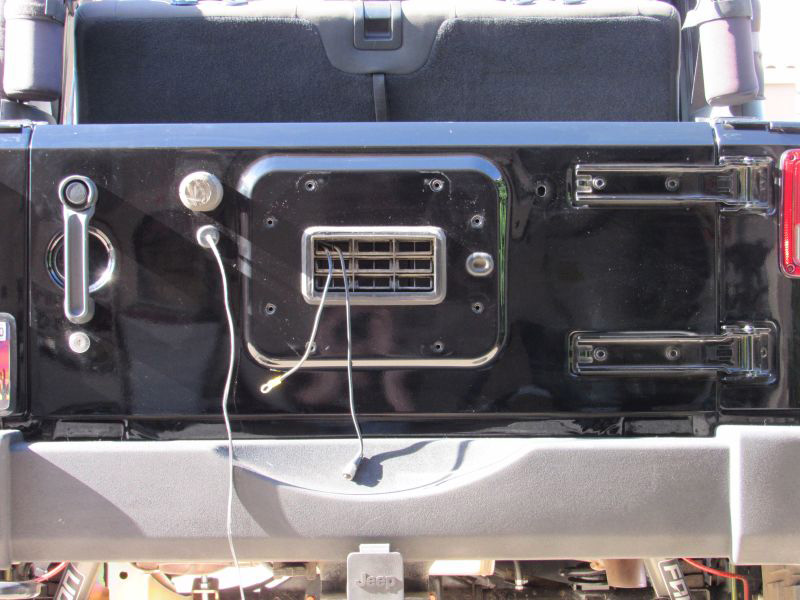
Remove the factory tire carrier and brake light holder by removing the 8 bolts, using a 13mm socket.
Step 10:
Ensure the tailgate is fully closed and locked. Place the prepared wood blocks between your bumper and tailgate. Make sure they fit tightly.
Step 11:
Remove the hinges from tailgate by removing the 4 bolts using a 13mm socket.
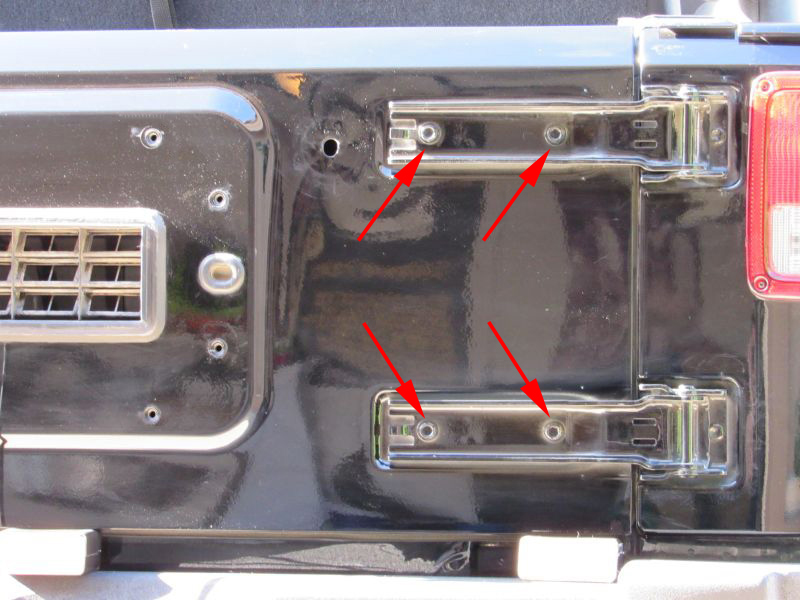
Step 12:
Swing the hinges open. Using a T-50 Torx bit, remove the torx head screws securing the hinges to the body of your Jeep.
You might need a 10-inch extension with the T-50 bit in order to reach the screws.
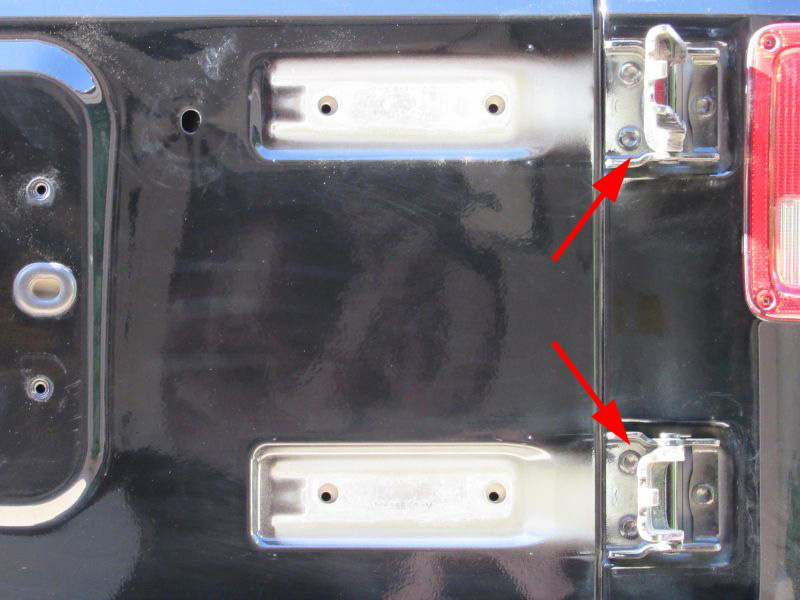
Step 13:
Clean any dirt, debris, and corrosion from tailgate and quarter panel where your new HD Hinge Casting and Tire Carrier will mount. If you are removing any corrosion, remember to paint over any bare metal to prevent future rusting. Make sure the entire area is clean and dry before installing new parts.
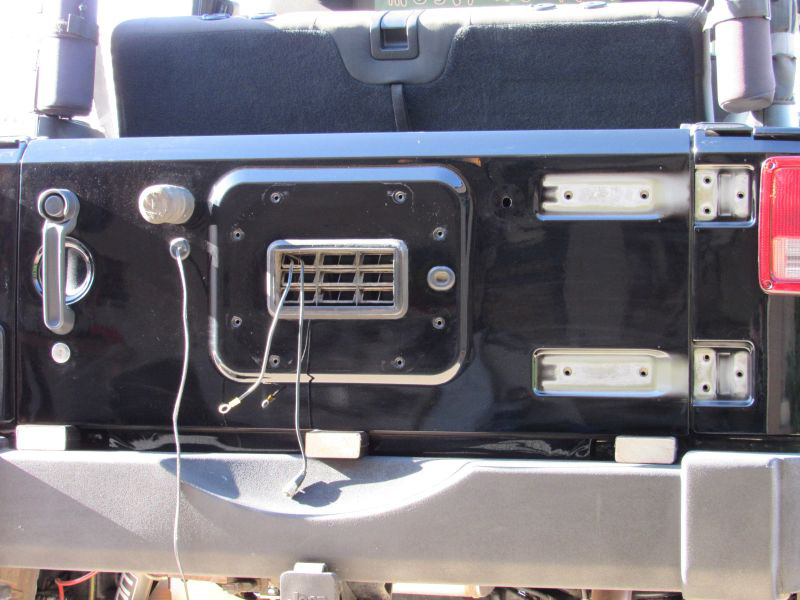
Step 14:
Place the Hinge Casting in position. I found it useful to hold it at a 45 degree angle.
Reusing factory torx head screws, fasten the hinge brackets to the quarter panel. Attach outside screws first. Do not fully tighten yet.
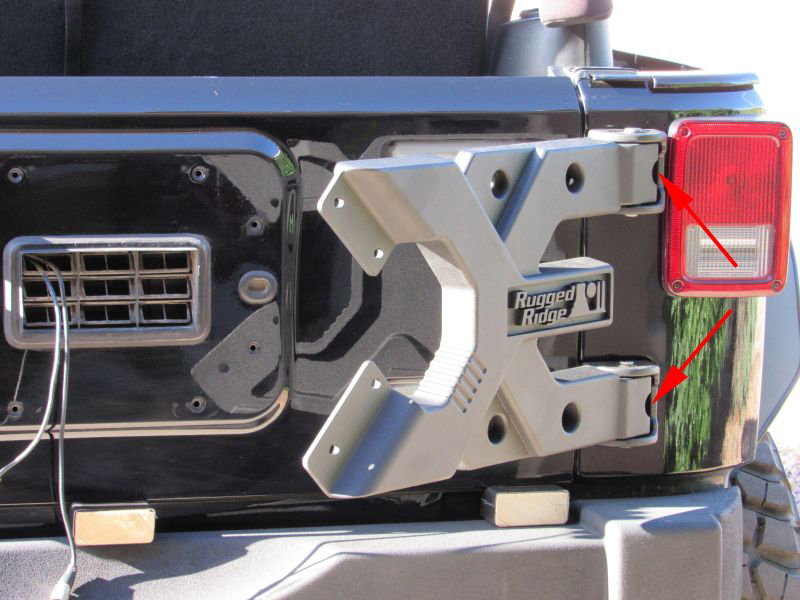
Step 15:
Swing the hinge open and install the remaining four torx head screws. Do not fully tighten yet.
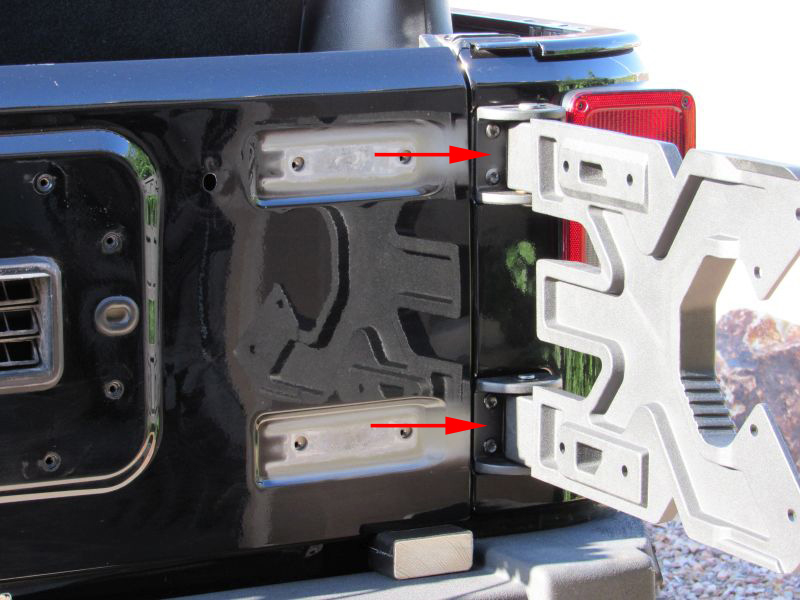
Step 16:
Position the Hinge Casting flat against the tailgate and temporarily install four of the Tire Carrier bolts.
This step ensures that the Hinge Casting is properly aligned.
Fully tighten outside Torx head screws on the hinge brackets.
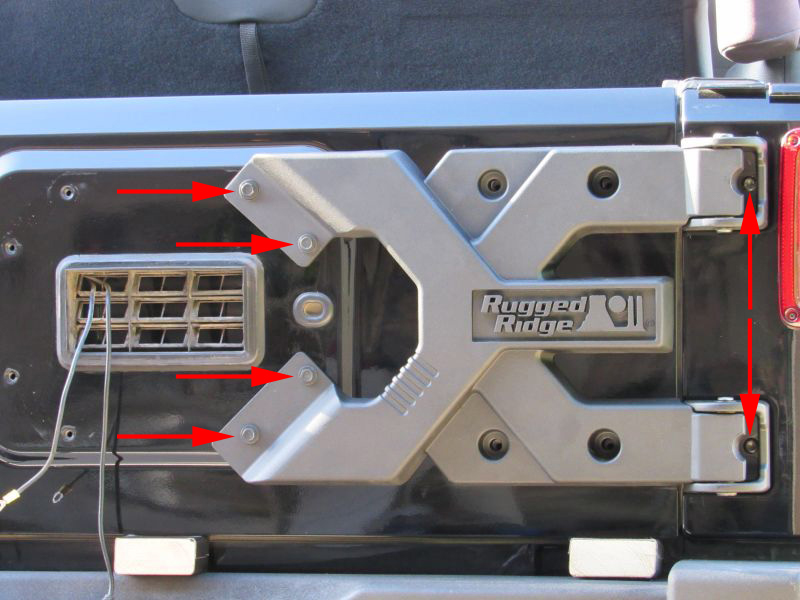
Step 17:
Remove the four Tire Carrier bolts.
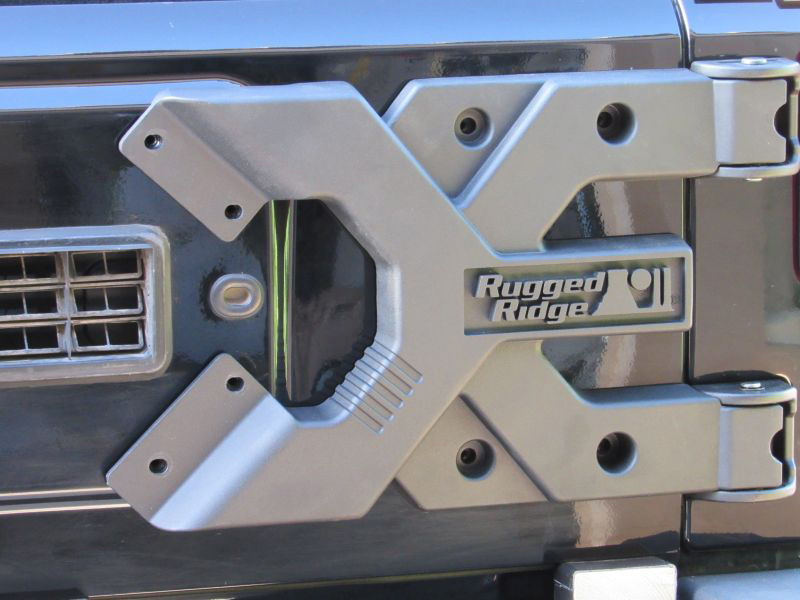
Step 18:
Swing the Hinge Casting open, making sure not to move the tailgate.
Tighten the four remaining Torx head screws on hinge brackets. Return to closed position.
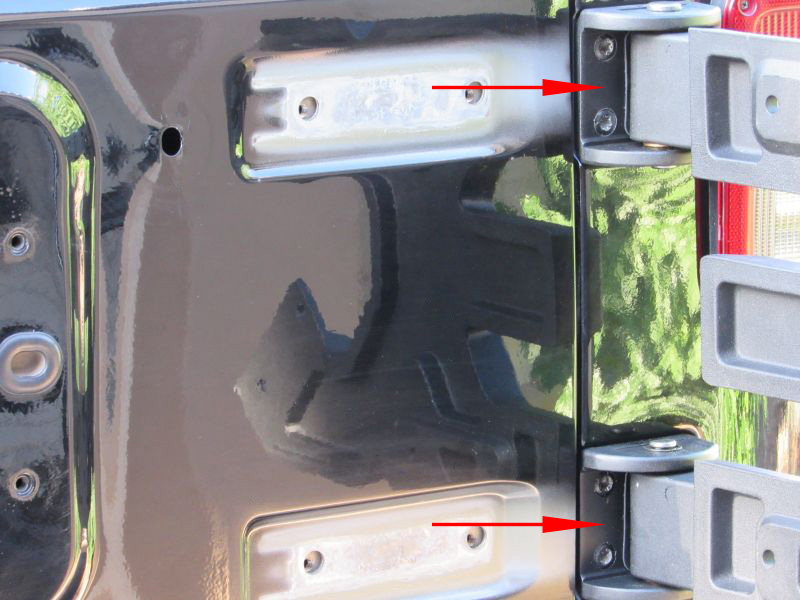
Step 19:
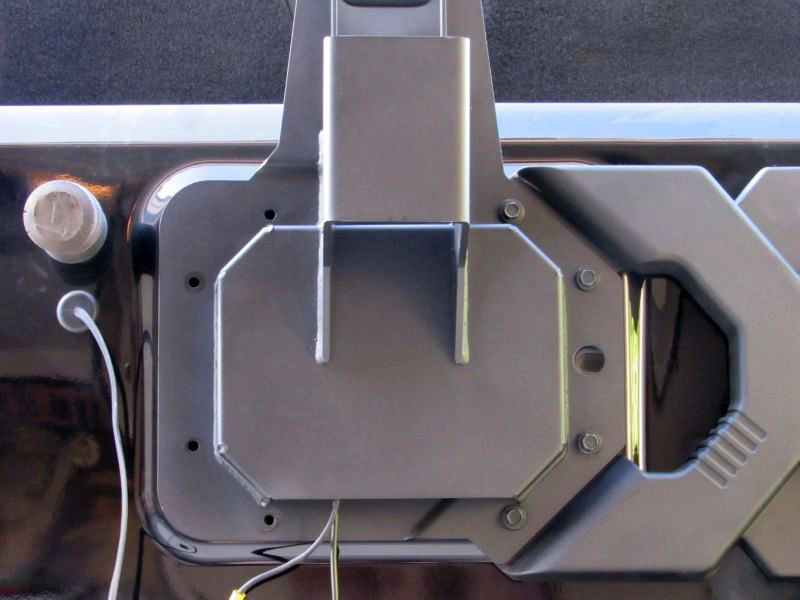
Position the Wheel Mount main plate in place on the tailgate. Use a 13mm socket to loosely thread 4 of the supplied M8 bolts and washers on the right side of the Wheel Mount. Do not fully tighten yet.
Step 20:
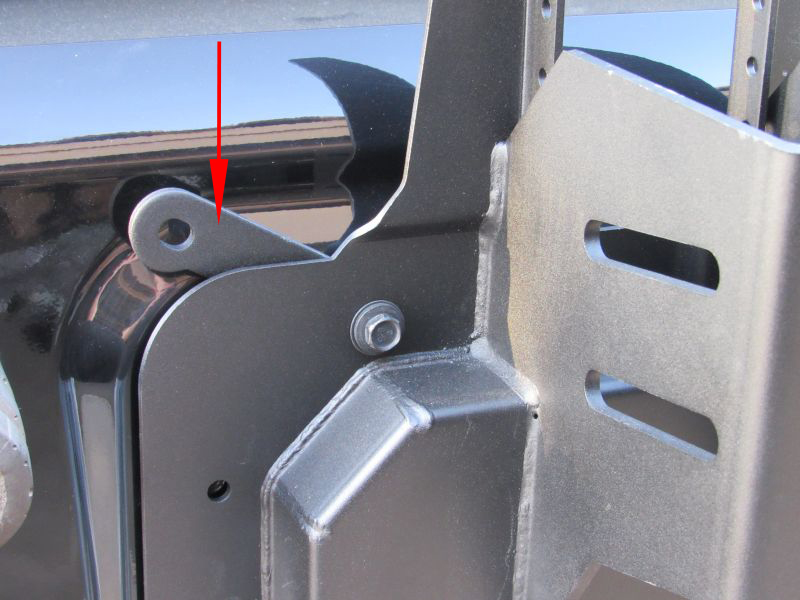
Slide the provided spacer plate between the top left corner of Wheel Mount and tailgate. Loosely install provided M8 bolts and washers with a 13mm socket.
Step 21:
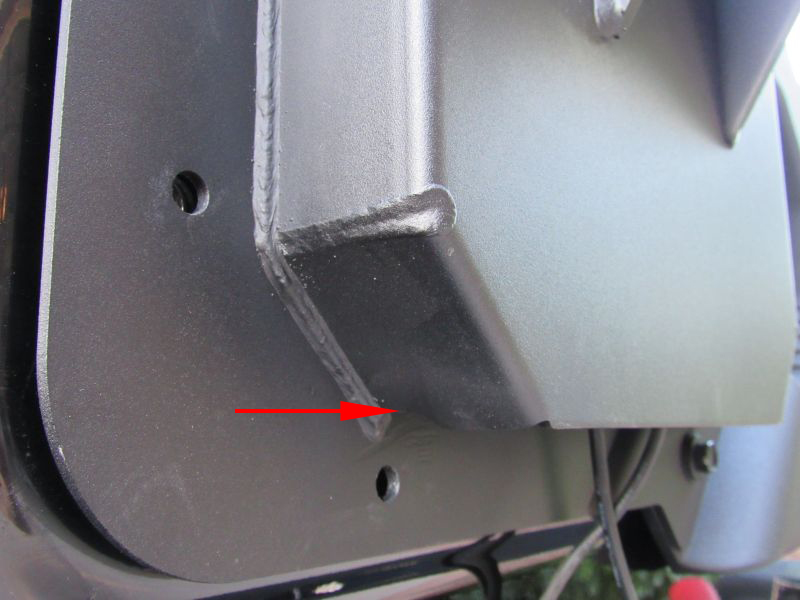
If you are reinstalling a CB antenna bracket, depending on a shape of the bracket, you might have to create a notch in the Wheel Mount, using an angle grinder. Remember to paint over any bare metal after grinding.
Step 22:
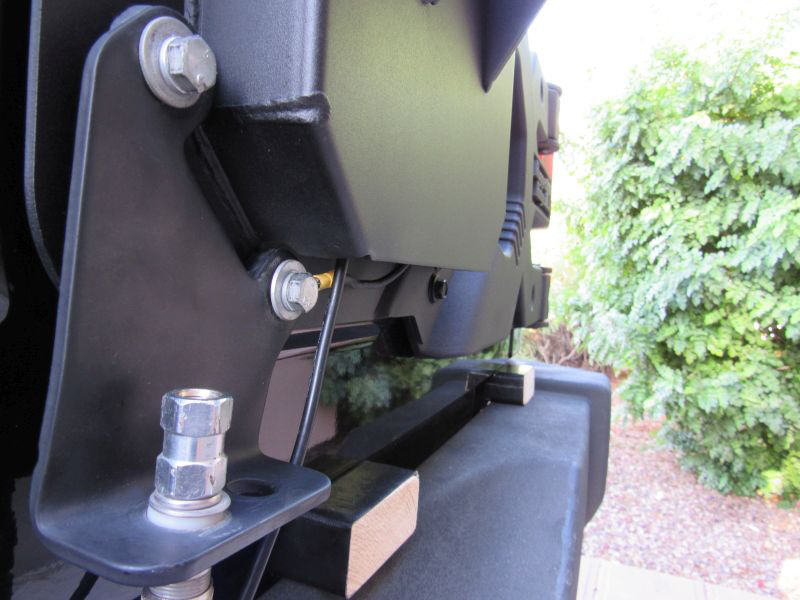
Slide the provided spacer plate between the bottom left corner of Wheel Mount and tailgate. Loosely install your bracket bolts and washers with a 13mm socket.
Step 23:
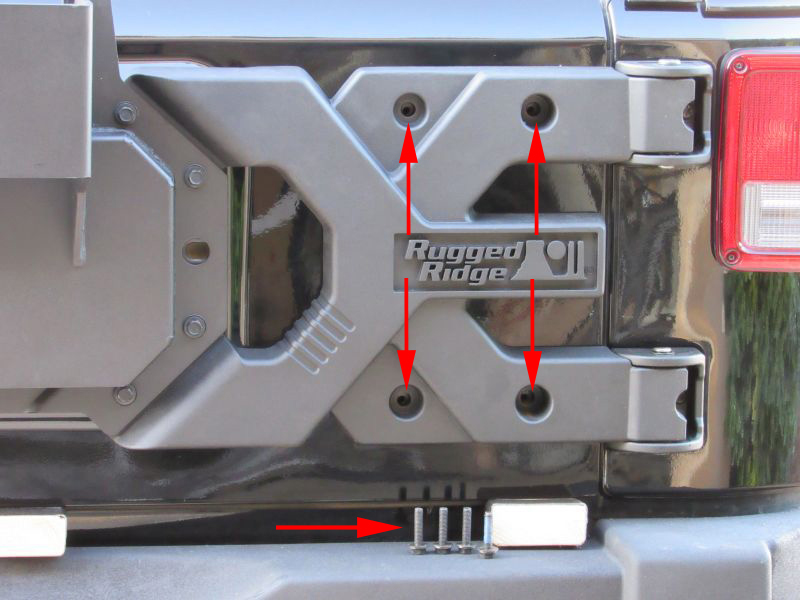
Apply some red thread locker (or blue if that’s the only one you have) on four provided hex bolts and install the bolts with washers, using a 13mm socket, to fasten the Hinge Casting to the tailgate.
These four bolts thread into plates inside the tailgate, and these plates can be moved and aligned using a small screwdriver. Start threading the bolts with your fingers, taking your time to make sure they catch correctly before using the socket and wrench.
Step 24:
Tighten all eight bolts on the Wheel Mount and the four bolts on the Hinge Casting (do not over tighten them – these bolts can break).
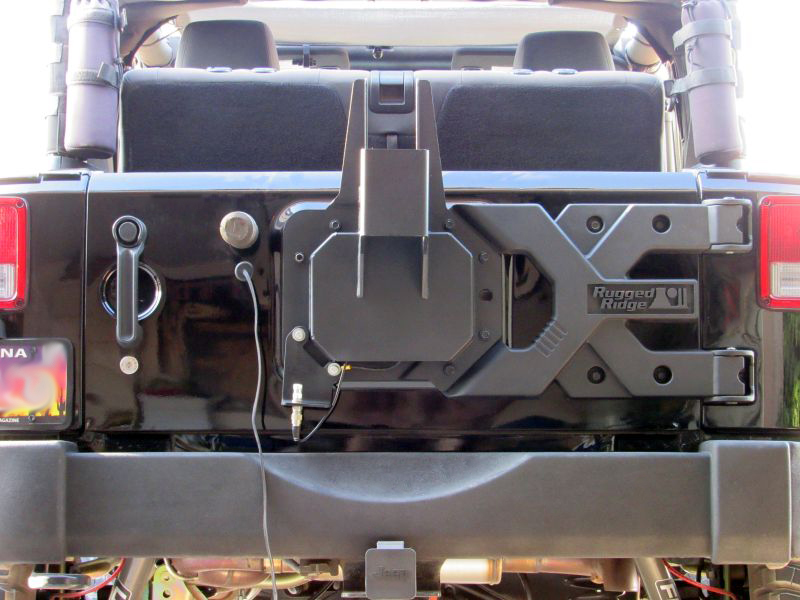
You can now remove the wooden blocks from underneath the tailgate. Open your tailgate and make sure it operates smoothly and closes properly.
Step 25:
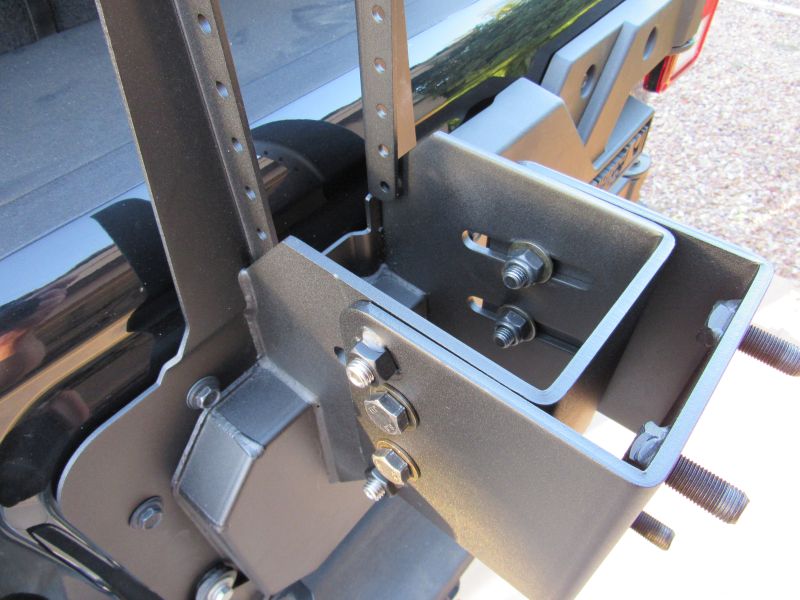
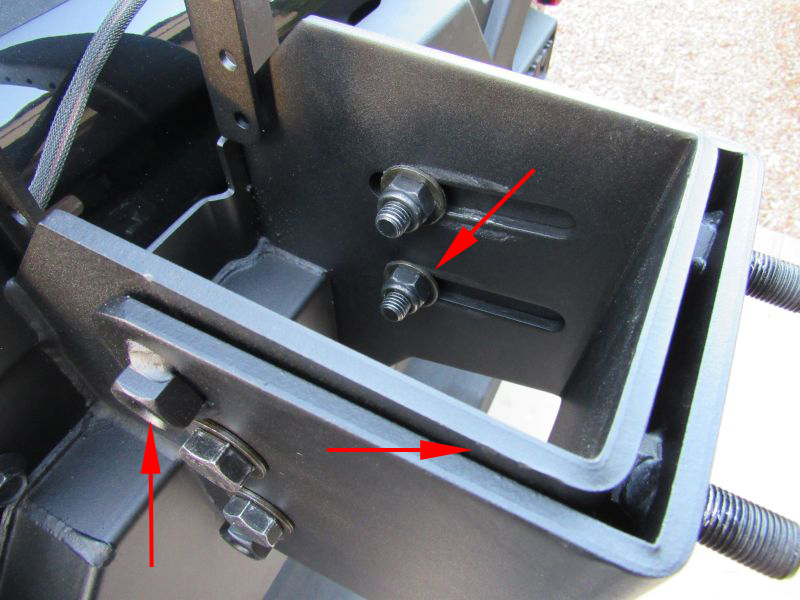
Slide the Lug Plate onto the main Wheel Mount plate. Using a 19mm wrench and socket, loosely secure the Lug Plate with supplied M12 hardware.
Do not fully tighten yet. Bolts should be tight enough to prevent Lug Plate from moving freely, but loose enough to manually adjust it’s position and orientation.
Loosely install 2 set-screws using a 6mm Allen bit.
Step 26:
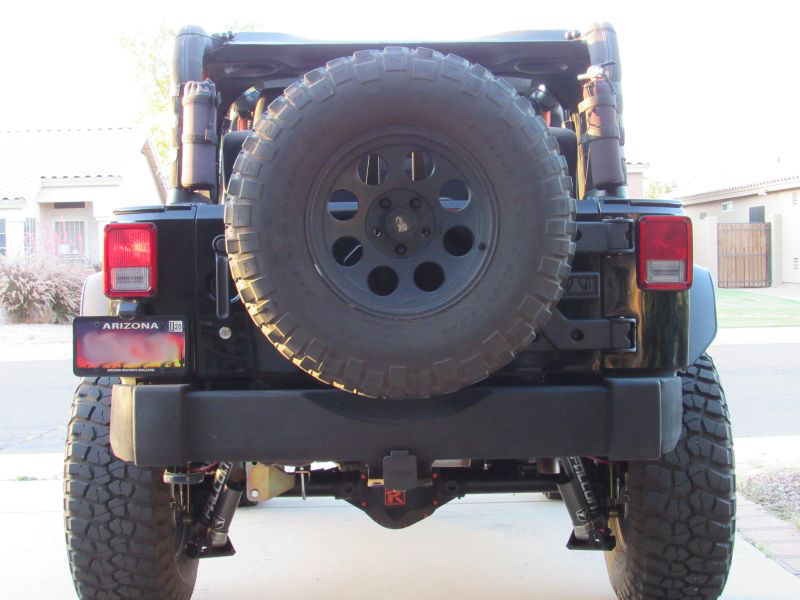
Install spare tire and lug nuts onto the Lug Plate. Manually adjust position & angle of your spare tire. It would be very helpful if you had another person assisting you with this step.
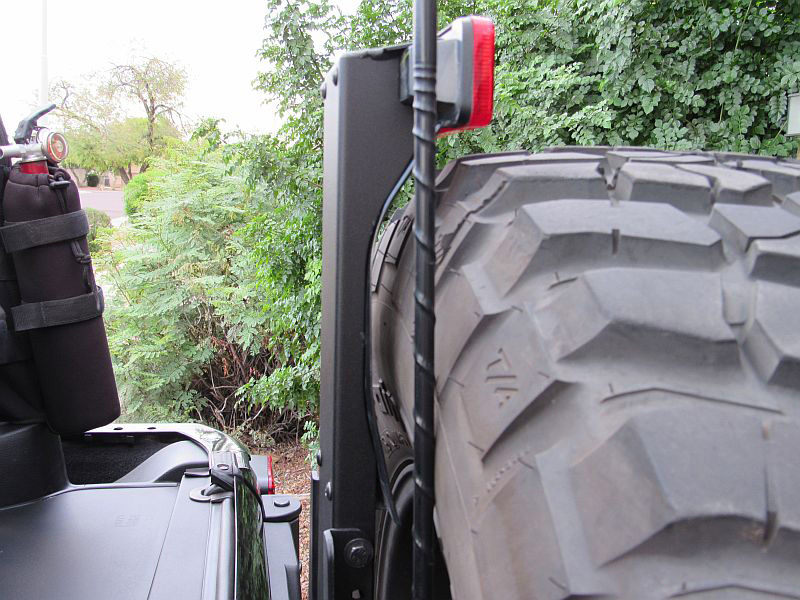
When adjusting wheel position, make sure wheel and tire are as close to the vehicle / Wheel Mount as possible, without touching it.
Step 27:
With my stock rear bumper and a 35 inch tire, I found that the optimal position for my Lug Plate was with the bottom M12 bolts all the way towards the tailgate and the Lug Plate leveled.
Fully tighten all bolts and the two set-screws.
Step 28:
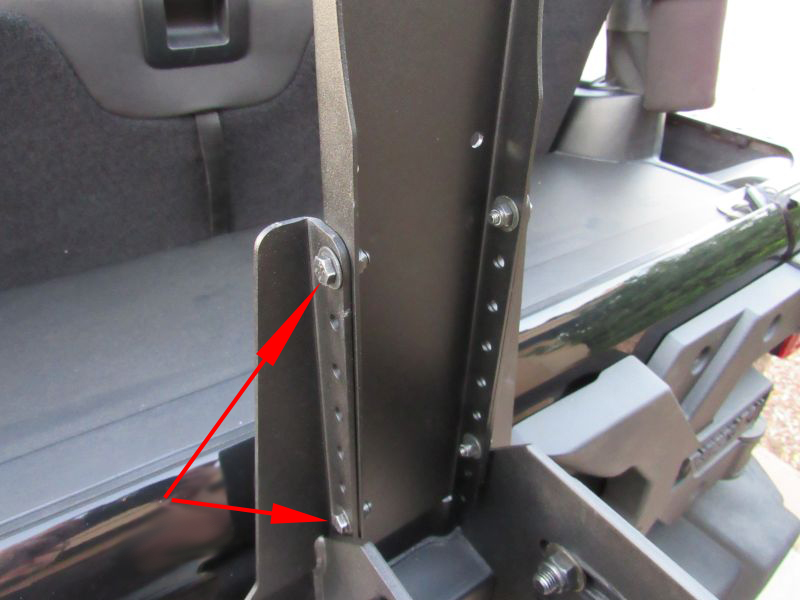
Install Brake Light Extension with supplied M6 bolts, washers and nylon lock nuts, using a 10mm wrench and socket.
I found that the lowest position of the Brake Light Extension works best for my 35 inch tire.
Step 29:
Reconnect cable to the factory third brake light by pushing connector until it clicks.
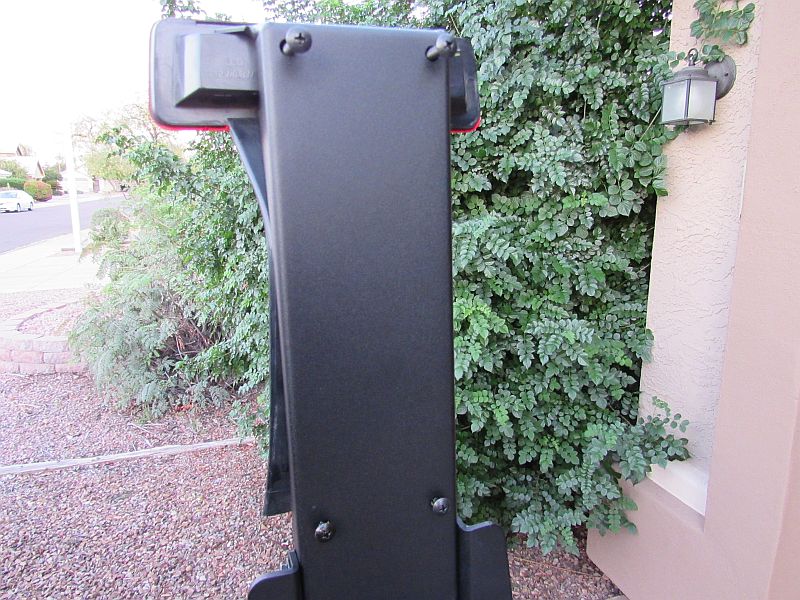
Install factory third brake light to the Brake Light Extension using provided #10 screws and Phillips head screwdriver. Long screws are for top two holes. Short ones are for bottom two holes.
Step 30:
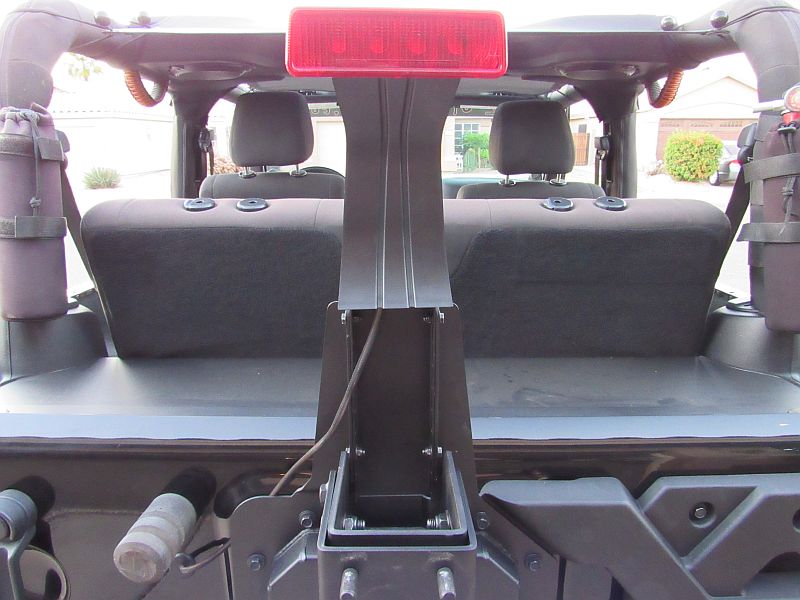
For 35 inch tires there should be no need for extending the wires, however if you have 37 inch tires, you will probably have to splice additional wires to factory third brake light wires. The kit provides two 18-in pieces of wire and four connectors to accomplish that.
Step 31:
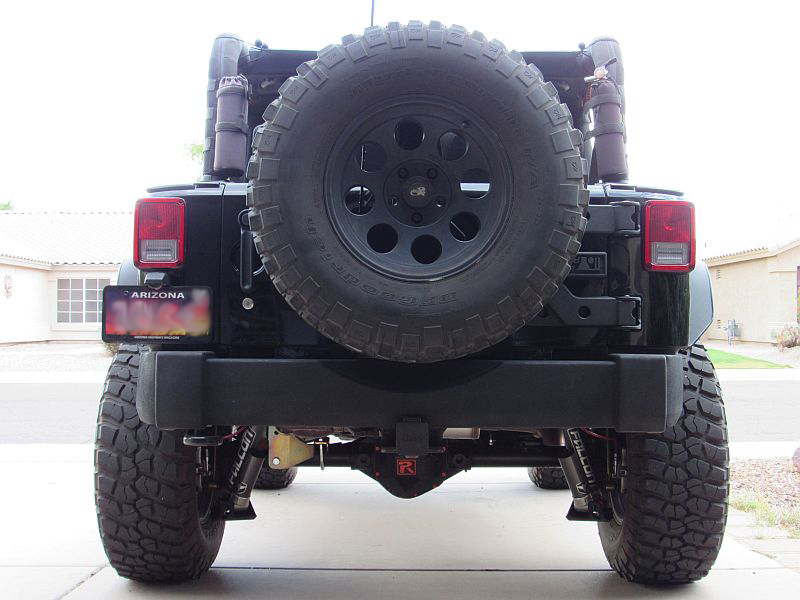
Install your spare tire and lug nuts back onto the tire carrier and inspect that everything is positioned correctly.
Step 32:
Ensure your third brake light is fully visible over your spare tire.
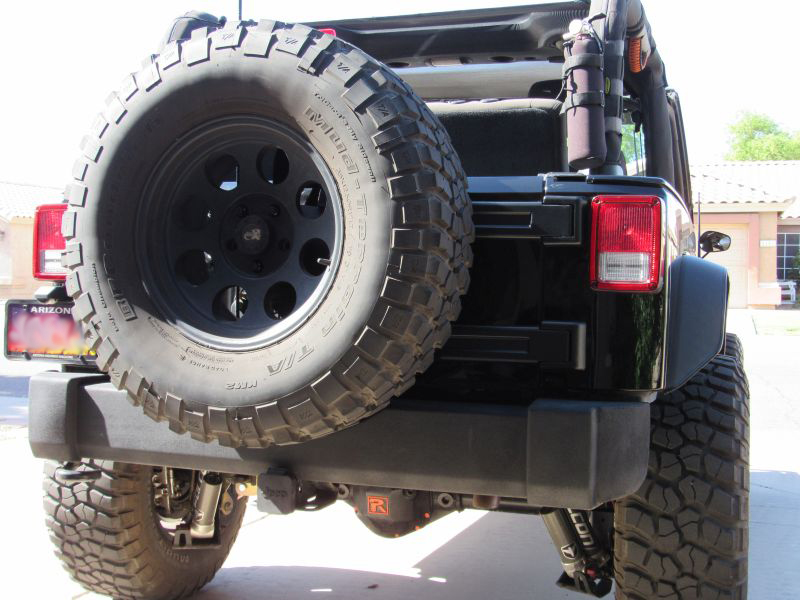
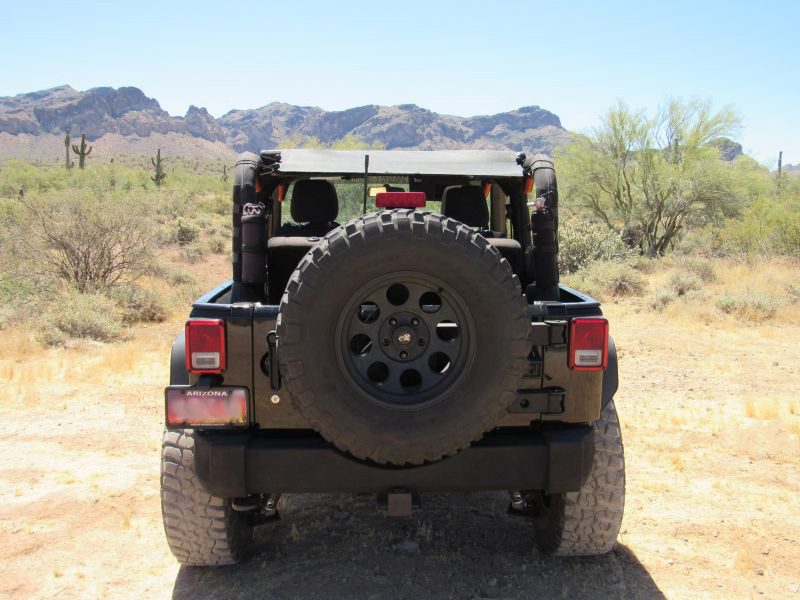
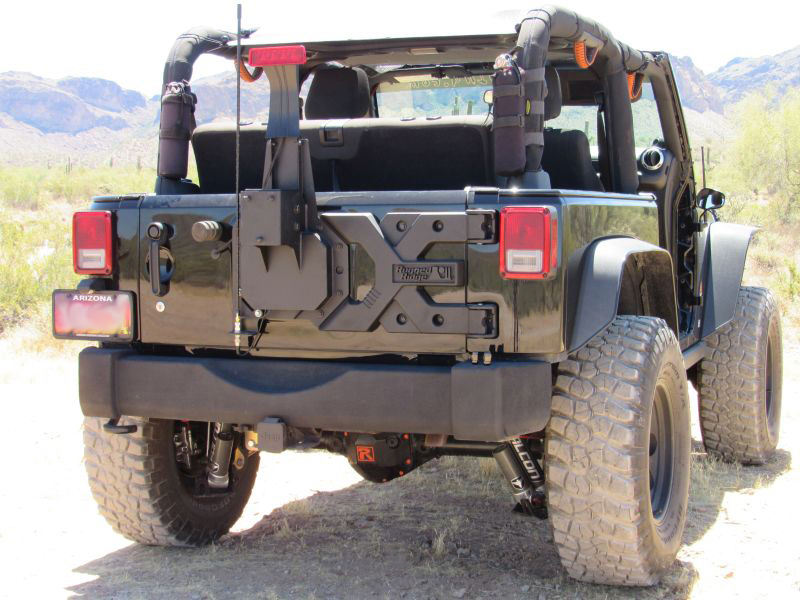
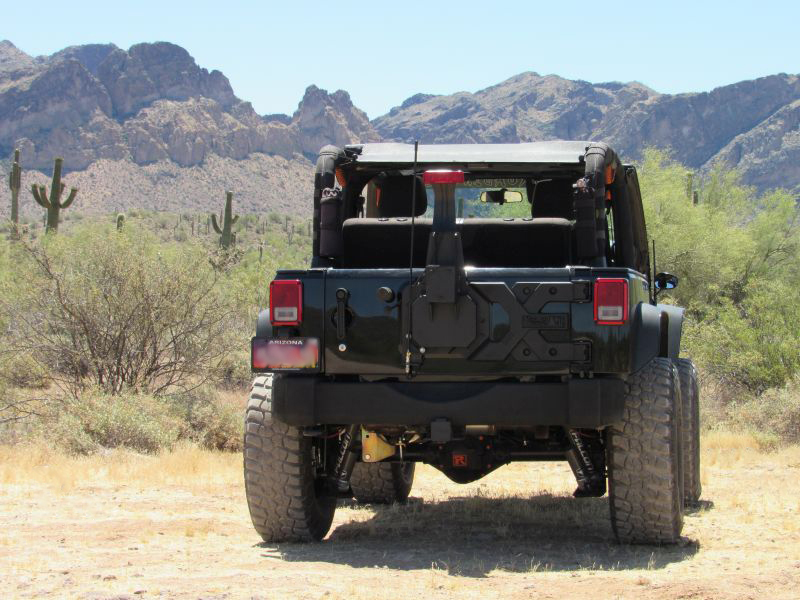
Few desert photos of the installed Jeep JK tailgate tire carrier by Rugged Ridge:

If you have any questions or suggestions, feel free to comment below.

