Check out these useful items

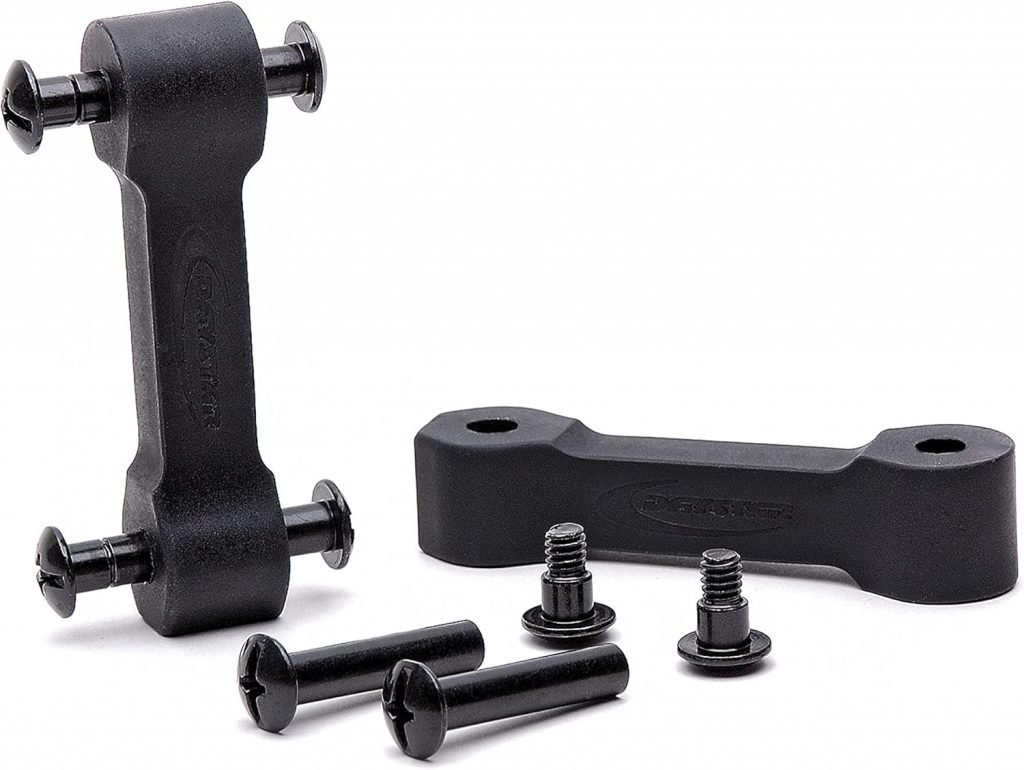
Daystar Hood Latch Upgrade Black Compatible with/Replacement for 2007-2018 Jeep Wrangler JK
Latest Blog Posts
- Jeep JK A/C Blend Door Actuator Replacement
- Jeep JK 3.6L V6 thermostat housing replacement
- My Jeep recovery gear
- Jeep JK 3.6L Pentastar Engine Oil Change
- Jeep JK Differential Fluid Change
- Jeep JK multi-function switch replacement
- Jeep Wrangler JK and JL Factory Bolt Sizes
- Jeep JK Jack Base by AEV
- Jeep JK Tailgate Tire Carrier by Rugged Ridge
- Jeep JK Dash A/C Vent Removal
Audiobook Recommendation

 A/C blend door actuator in your Jeep JK is a very important part of the heating and cooling system and is responsible for controlling the temperature of the air blowing thru the vents and into the cabin. To blow heat into the cabin, the blower motor sends air through the heater core and on through the dash vents. But when heat is not desired, the blend door actuator directs that airflow away from the heater core. Unfortunately blend door actuators can fail at some point and cause the inability to change the air temperature inside your Jeep. The reason I needed to replace the blend door actuator in my Jeep was due to the horrible and loud ticking/grinding noise that it was making every time I put the key in the ignition. I also noticed that the actuator resets itself and makes the same noise after about two minutes from turning off the engine. With the Jeep being topless and doorless, and me using public parking lots, I was afraid someone walking by would freak out and call the cops, thinking my Jeep was about to explode…
You might also experience this loud ticking noise when you open your door, turn on the ignition, or turn the temperature knob on the HVAC control panel. You might also simply not have any hot air coming to the cabin, which means that your blend door actuator is not working at all, and needs replacing.
Here are a couple of videos showcasing the noise being emitted by the broken blend door actuator: video 1 and video 2. I also used these videos in the process of creating this step-by-step write up. Thank you to the authors of the videos!
I could be wrong, but I believe there are actually three actuators installed in a Jeep Wrangler JK, each responsible for different function. There is the blend door actuator responsible for controlling the temperature, the directional actuator (probably not a correct technical name) responsible for directing the air to different vents, and the re-circulation door actuator which controls the air dam behind the glove box.
Each actuator is activated by a different knob or setting on the HVAC control panel.
If you run your Jeep for few minutes, take the glove box out, and turn off the engine, after about two minutes you can see and hear three small motors re-calibrating the three actuators, in sequence.
I do believe all three actuators are the same exact part even though they are mounted in different locations. Blend door actuator is located on the driver side below the steering column, directional actuator is located behind the glove box on the left side, and the re-circulation door actuator is located on the right side of the air dam, behind the right speaker.
This step-by-step write up describes replacement of the blend door actuator only, since that’s the one that failed in my case. As a reference I included a photo of the directional actuator in the last picture.
I have a 2012 Jeep JK so if you own a different Model Year JK, some things might look different.
Replacing the blend door actuator itself is quite simple, however getting access to it is the time consuming part.
The whole process of a Jeep JK A/C blend door actuator replacement will most likely take you about 2-3 hours, depending on few factors, especially on how long it takes you to remove the floor air duct, blocking access to the actuator. That step might take you few minutes or an hour.
Disclaimer:
Like I always mention I am not a professional mechanic, I just try to do as much work on my Jeep as possible. It helps me learn more about my vehicle and save some money that can be spent on parts and upgrades.
I take no responsibility for any injury or breakage which might occur if you decide to follow these steps. You have to decide if you’re comfortable working on your Jeep. If you’re not, please have a professional complete this project for you.
As an Amazon Associate I earn commission from qualifying purchases. It allows me to offer contents of this website free of charge to everyone.
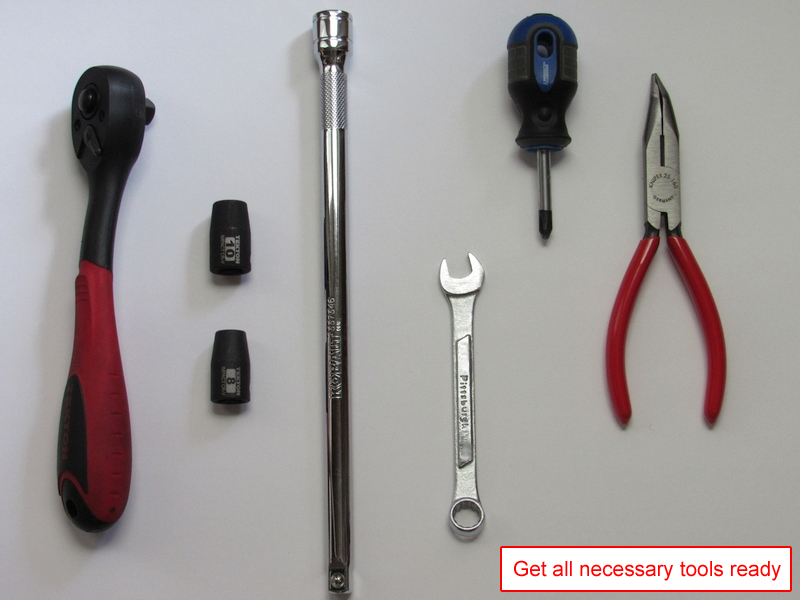
Parts and tools needed:
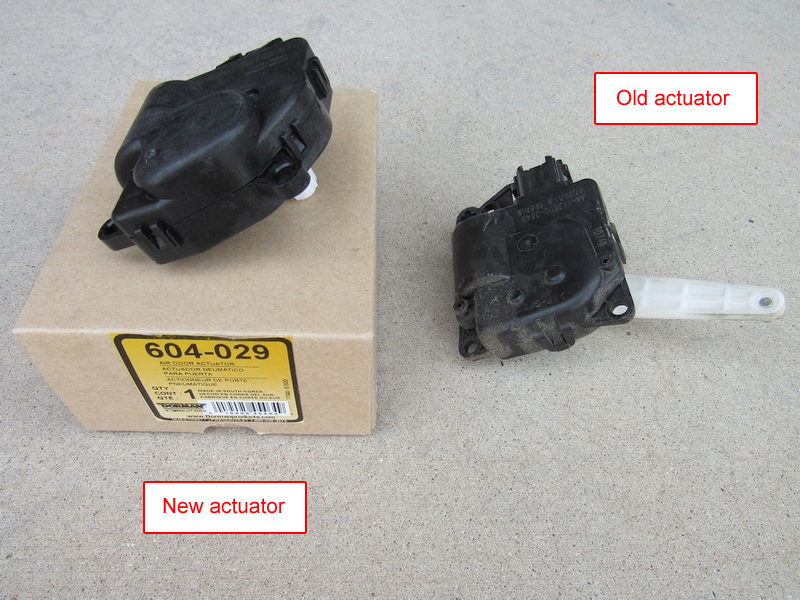
1. Jeep JK A/C Blend Door Actuator by MOPAR, or Dorman A/C Heater Blend Door Actuator
2. 3/8″ Ratchet and 8mm & 10mm sockets
3. 10″ Long 3/8″ Drive Extension Bar
5. Stubby Phillips Screwdriver
6. 45-Degree Bent Long Nose Pliers
Procedure:
Step 1:
Prepare your tools and get everything ready before you start the project.
Step 2:
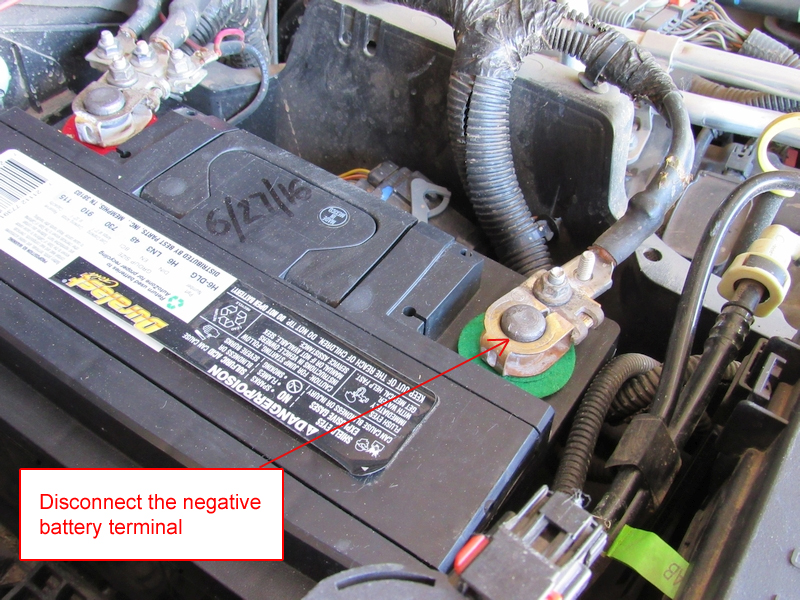
Disconnect negative terminal of your battery. This is an optional step, however you are going to be disconnecting and reconnecting electrical connectors inside your Jeep during this project.
Step 3:
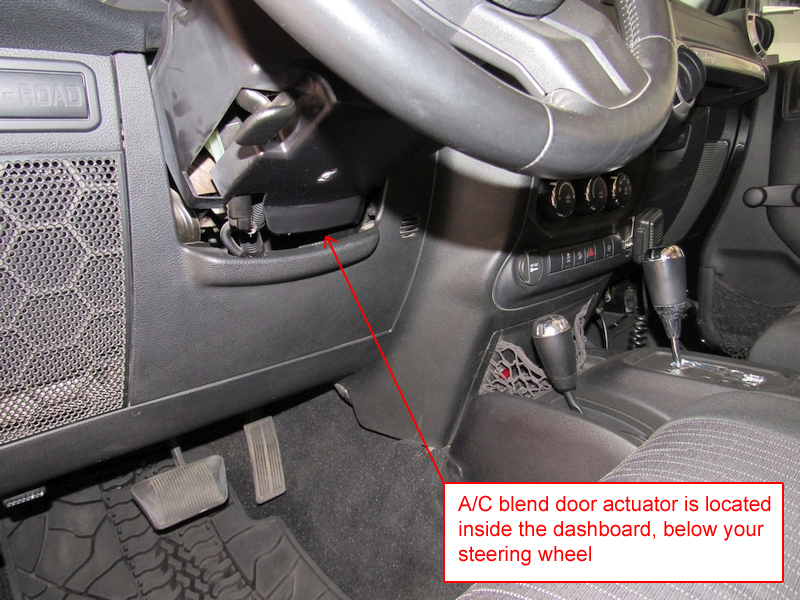
The driver side A/C blend door actuator is located inside your Jeep’s dashboard, below your steering wheel. Removing your driver side door completely will help you with access to the components you’re going to be working on.
Step 4:
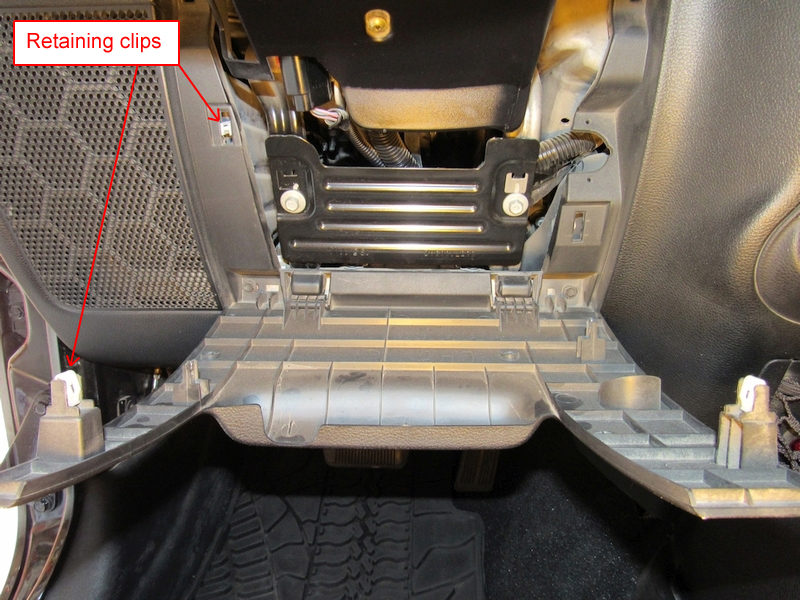
Remove the plastic panel below your steering wheel. It is held in place by four clips. Start from the top and pop it off. It will tilt downward on the two plastic hinges at the bottom. Put the entire panel to the side.
Step 5:
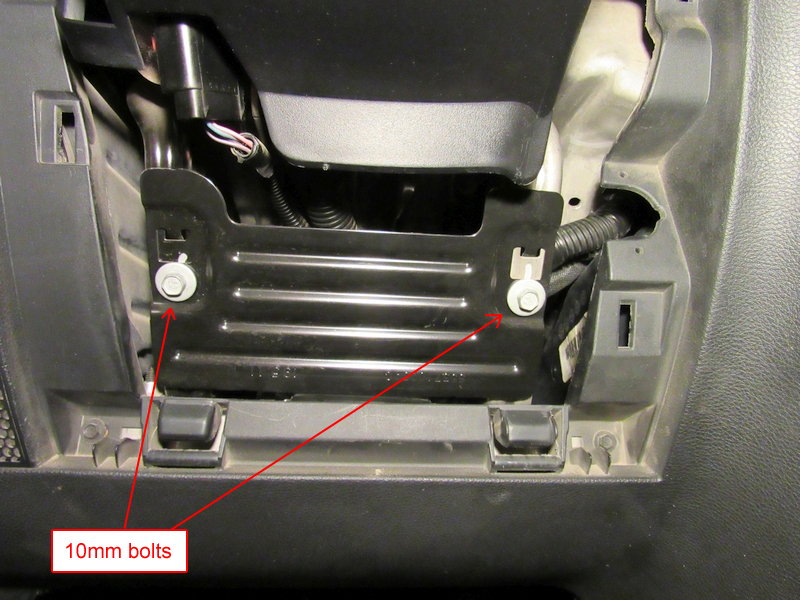
Remove the metal plate by unscrewing two 10mm bolts.
Step 6:
Removing the metal brace on the right side will provide better access to other components. Remove the top bolt using an 8mm socket.
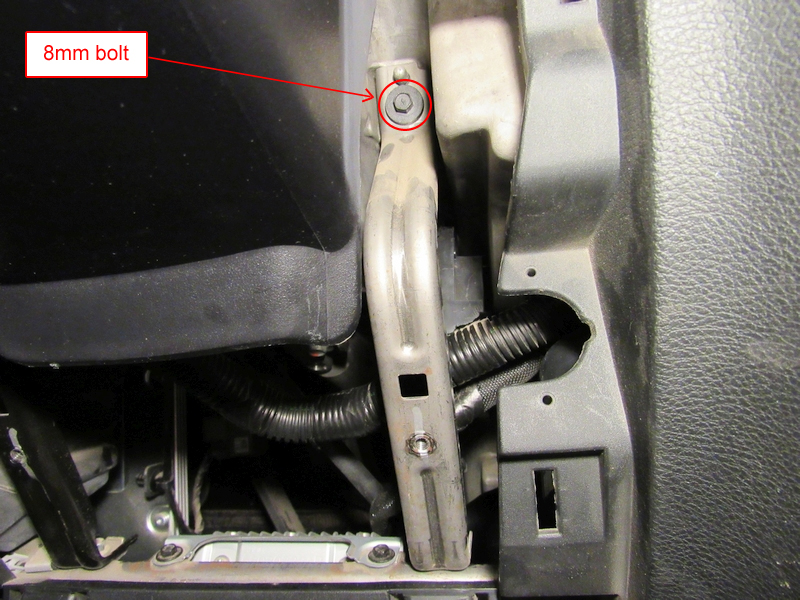
Step 7:
Remove the bottom bolt with an 8mm wrench.

Step 8:
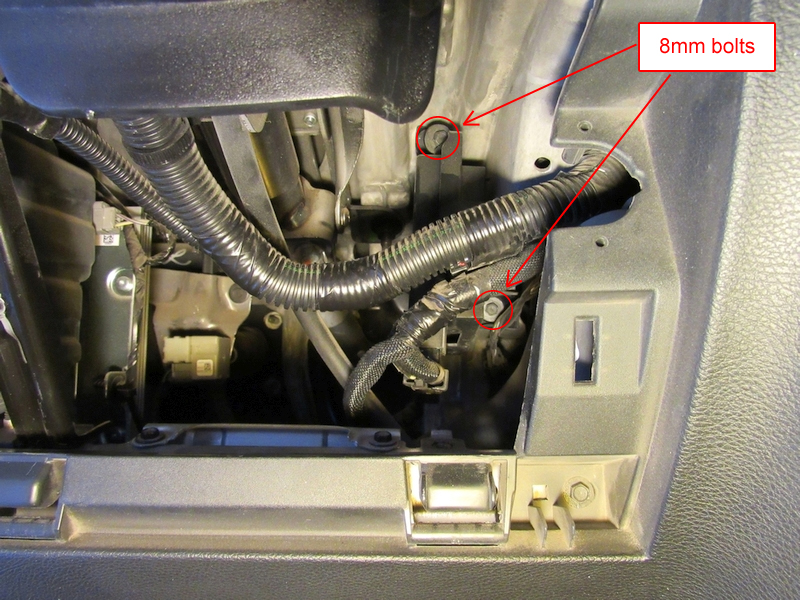
Unscrew two bolts securing the control box, using an 8mm socket with 10″ extension. No need to unplug the box, however you will need to pull it away from the Jeep’s body and twist it, in order to move it away from the actuator and gain better access to it.
Step 9:
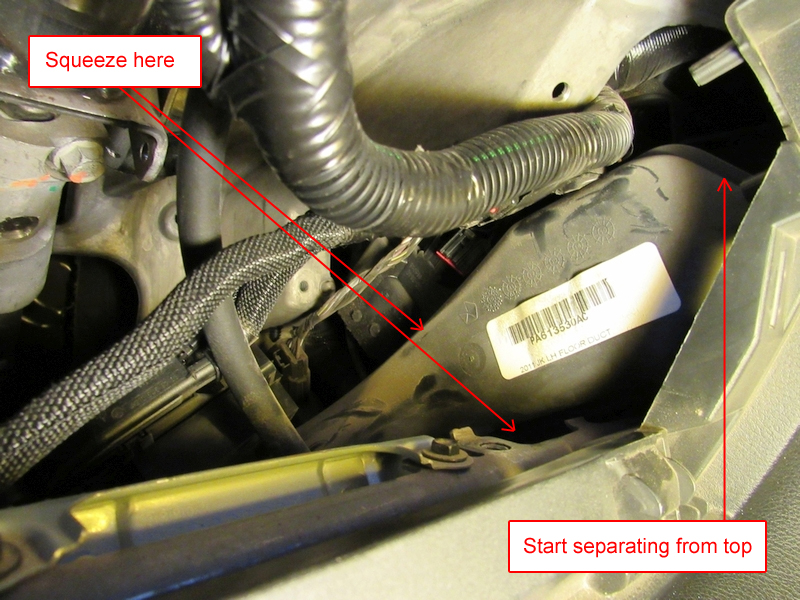
Now comes the most frustrating part 🙂 For total access to the blend door actuator, it’s arm and the track, you will need to remove the air conditioning floor duct. The duct is made out of two plastic pieces, held together with seven tabs. Separating the two halves and pulling them out is going to be the most time consuming and irritating part of the entire project. Take your time and be patient. What I found to work best is to squeeze the outer shell of the duct in the middle with one hand, and with your other hand place your finger between the two halves right at the top. Carefully but forcefully run your finger along the edge of the duct and you should be able to feel the outer shell separating. As soon as you get more leverage, the process should become easier. Be mindful of all the wires in the area. When you finally get the outer half of the duct free, pull it out thru the bottom of the footwell.
Step 10:
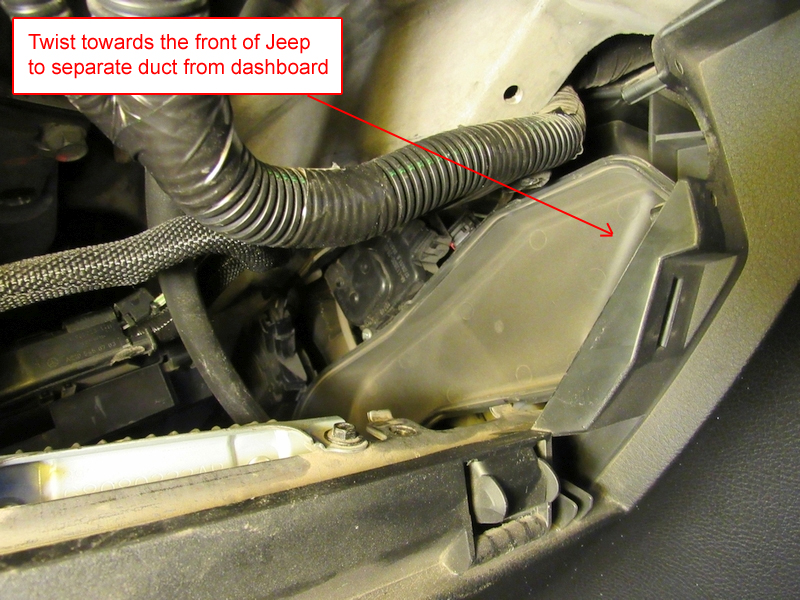
With the outer portion of your Jeep’s floor duct gone, it’s time to remove the inner half. It is not held in place with any screws, it is only attached at the top by being pushed into an opening in the distribution housing. The duct is held there with a couple of tabs. I found that simultaneously twisting the duct upwards and towards the front of the Jeep, helped with the removal. It is a slow process as the duct seems to come out just a bit at a time. Again, be patient and take your time. As soon as you get it loose, simply pull it out thru the bottom of the footwell. Pay attention to the way it’s coming out, so you can reverse the process later on.
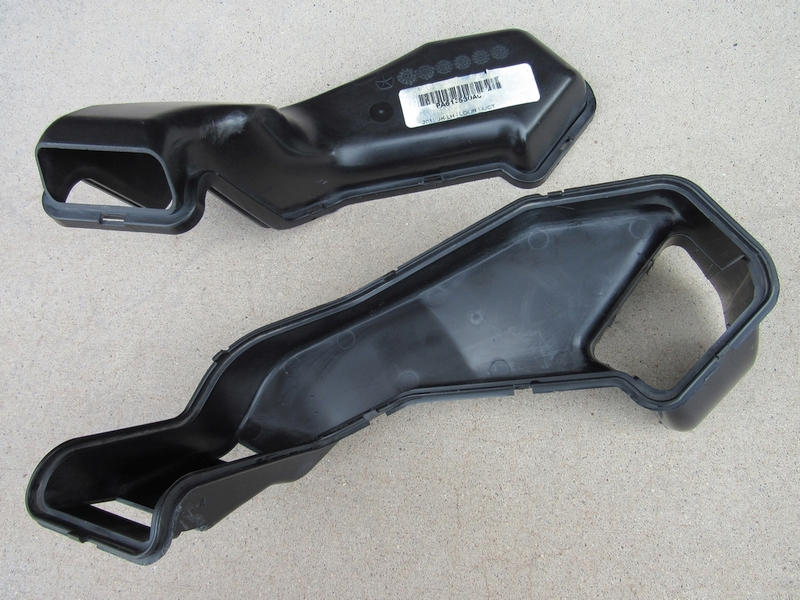
Better view of your Jeep JK driver side floor duct assembly.
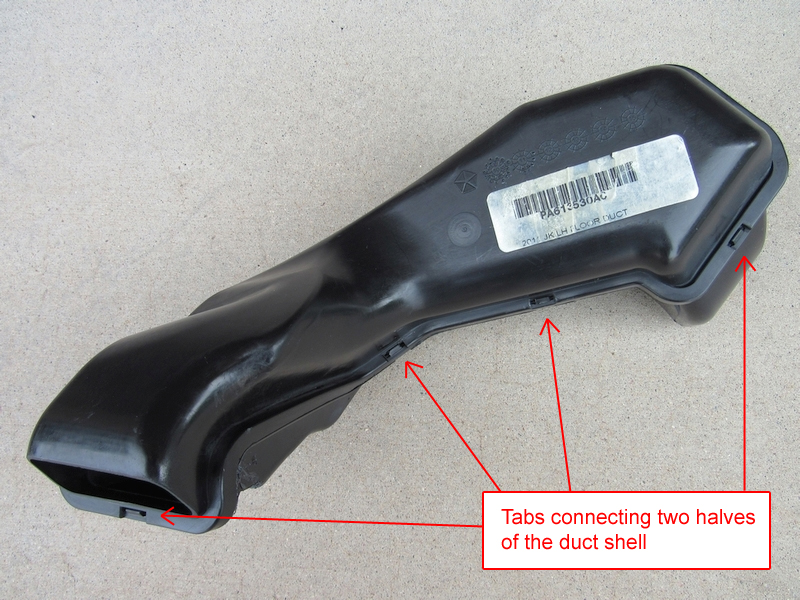
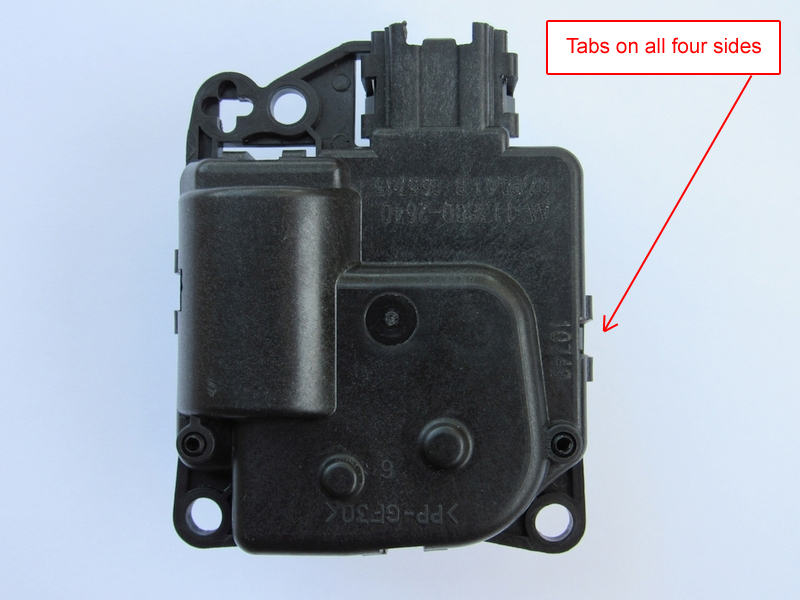
Floor duct’s two halves with the tabs holding them together.
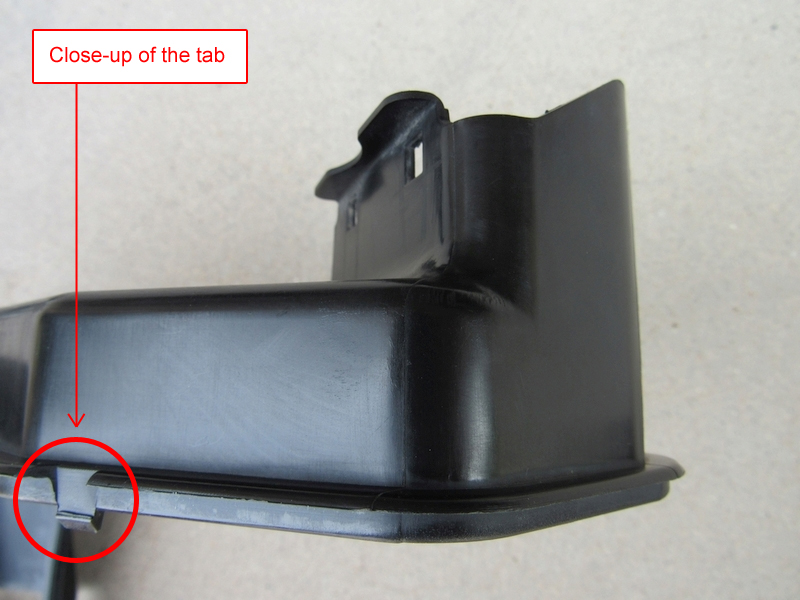
Closeup of the edge and one of the tabs.
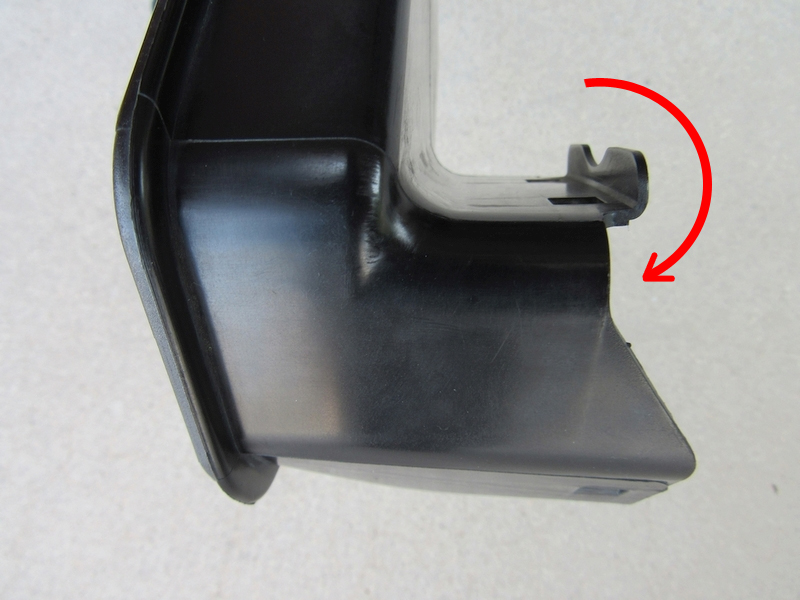
Upper portion of the inner shell of the duct, with the holes and bend/tab holding it secured to the dashboard.
Step 11:
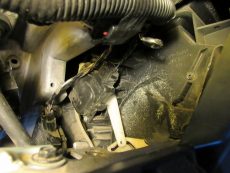
With the air duct gone, you now have full access to the actuator and the track that it connects to. Before you remove the actuator, unplug it’s electrical connector. You can also unplug the accelerator pedal connector, for better access to the two screws securing the actuator in place. Carefully remove the two screws with a stubby Phillips screwdriver, making sure you don’t strip or drop them. Pull out the blend door actuator, with the arm attached.

Step 12:
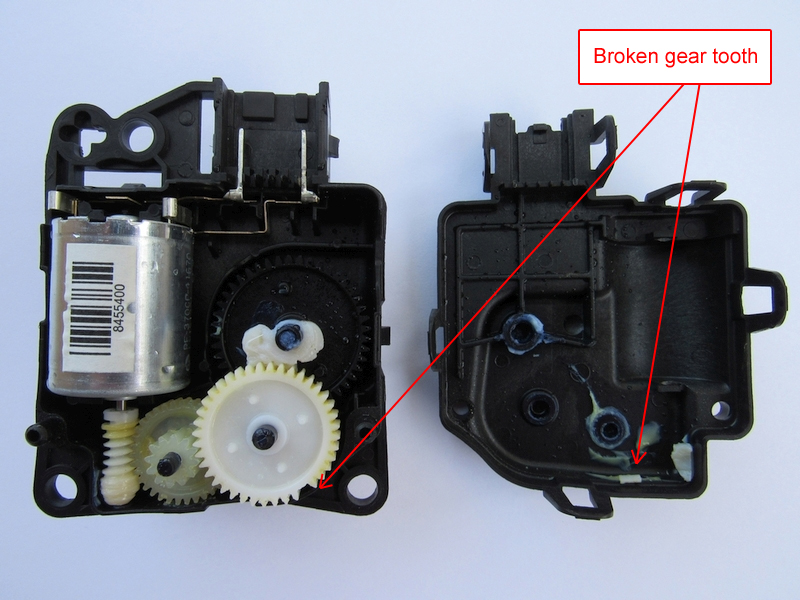
You can open up the actuator if you want to inspect the mechanism inside, and the damage causing it to not work properly.
The most common reason for the actuator to fail is a broken gear tooth. These gears are made of plastic and brake without warning. It would be nice if these gears were metal, however I don’t believe that’s even an option on brand new replacement actuators.
Step 13:
Carefully remove the plastic arm attached to the old actuator and transfer it to the new one. Try attaching it at a similar angle.
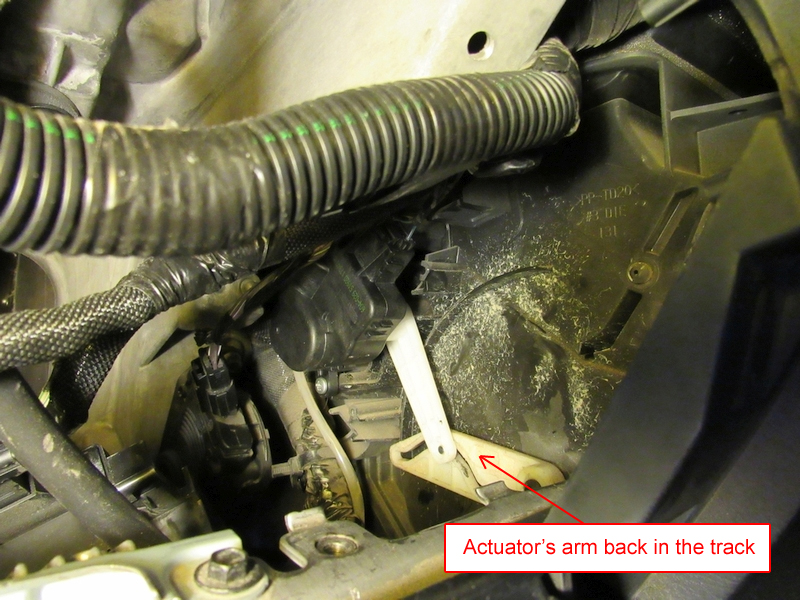
Step 14:
Install your new blend door actuator. Position the pin of the arm inside the track, position the body of the actuator in place, and secure with the two screws. I found it helpful to use the 45-Degree bent long nose pliers to hold the screw with one hand and operate the stubby screwdriver with the other hand. Plug in the electrical connectors of the actuator and accelerator pedal. If you wish you can reconnect your battery now, to test your new actuator, otherwise reconnecting the battery can be your last step. If everything seems to work correctly, start carefully installing the air duct back in place. Make sure no wires get in the way while you snap the two halves of the duct together. Secure the control box back in it’s location, install the metal brace and the plate, and finally push-in the plastic panel under your steering wheel.
UPDATE: About a week after installing the Dorman blend door actuator I actually ended up replacing it with the MOPAR version. Right after the Dorman actuator was first installed I started having an issue with the defrost light on the control panel blinking for approximately 30 seconds every time I started my Jeep. Only after the indicator stopped blinking, the air would begin to come out of the vents. The actuator would also randomly make whining noises. It is possible that I received a defective part. I ended up returning it and bought the MOPAR actuator, which I installed the same way. I have not had any issues since.
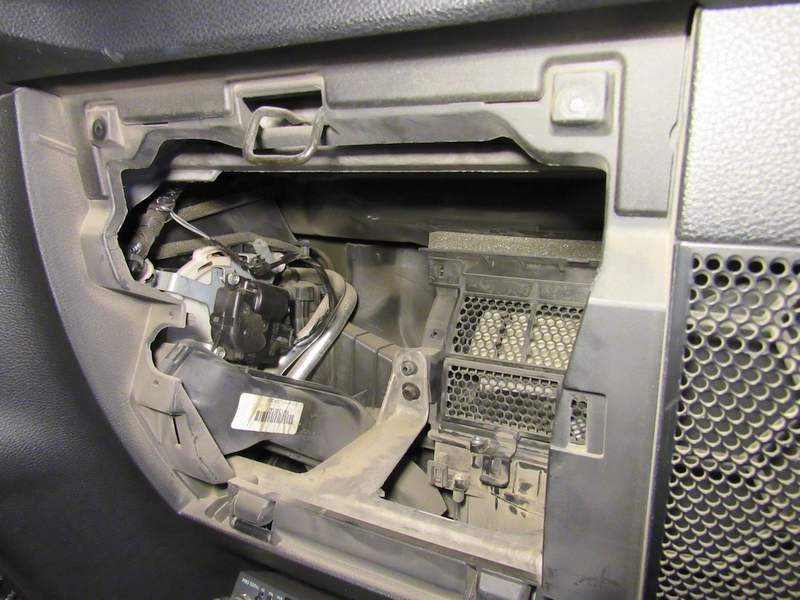
As a reference, here is a picture of the “directional” actuator, located behind the glove box, on the left side and mounted to the center console. The recirculation door actuator is located on the right side of the air dam, behind the right speaker, and not visible without removing the speaker box.