
Do-It-Yourself wooden car ramps
1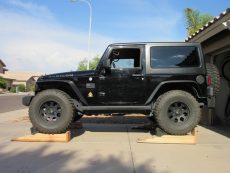 A lot of work you might want to do on your Jeep, SUV or truck can be done on the ground level and doesn’t require jacking up the vehicle.
If you’re rotating tires, you need to jack up the axles so the wheels/tires are off the ground.
When you’re working on suspension you need to jack up the frame so that the axles can be lowered.
Sometimes however you might need easier access to the under body with more room to maneuver. When you’re changing oil or working on exhaust or skid plates, you could use ramps to drive on top of, to get more room under your vehicle. Using ramps is easier and quicker that jacking up the entire vehicle and setting up four jack stands.
There are several options available if you decide to purchase car ramps, like the RhinoRamps, Scepter Ramp Set, Magnum Ramp System, Black Widow Service Ramps or a Nicky Nice Solid Steel Ramp Set.
Most of them are made out of plastic, some are steel. Weight limits vary and can be anywhere between 6,000-16,000 lbs. These numbers suggest that those ramps should be fine for Jeeps, trucks or SUV’s, but I have seen way too many photos of broken ramps that collapsed under vehicle weight to trust them myself. There is something about the hollow construction of these ramps that makes me uncomfortable. They seem to also slide when you start driving onto them. And there is the cost – they are not cheap, usually you would have to spend around $100-140 for a set of four. They are however light and easy to store.
After considering all the pros and cons, I decided that I would rather make my own ramps and make them out of material that will definitely support the weight of my vehicle – wood. I could custom build them to fit my tires and the height that I prefer. They are much heavier (about 33 lbs each) and larger than the plastic ramps, but they cost less money. You need to make sure you have a place to store them when they’re not being used.
Building your own set of DIY wooden car ramps is a very easy project. If you have all the materials and tools ready, it should take less than a couple hours to complete all four ramps.
Materials needed:
1) 2-in x 10-in x 12-ft piece of lumber (one 12-ft piece per ramp)
2) 2.5-in Interior/Exterior Wood Screws
3) Duck 20-in x 12-ft Black Shelf Liner
4) Staple gun and staples
Procedure:
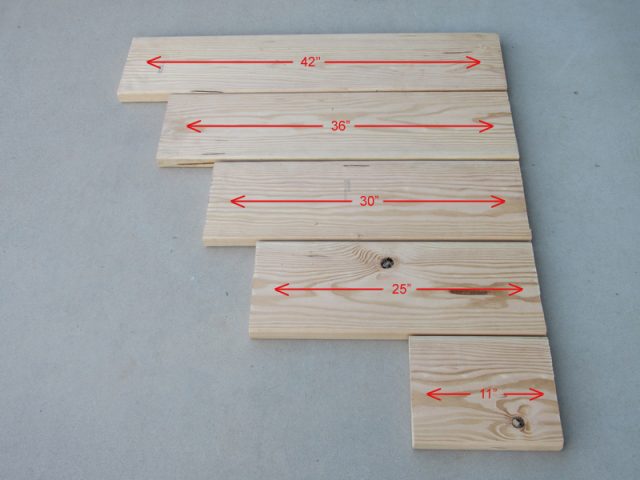
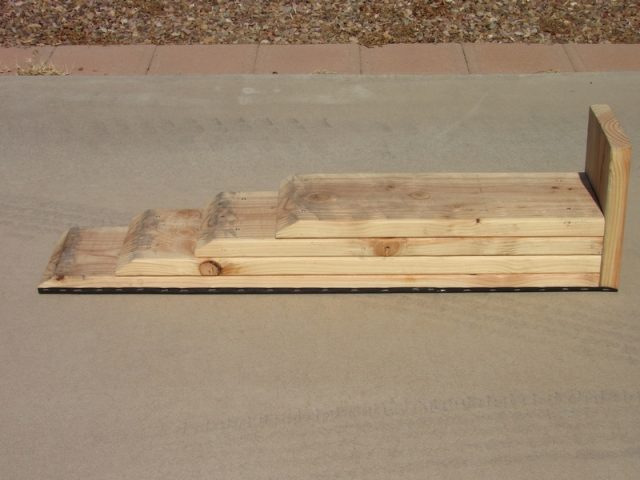
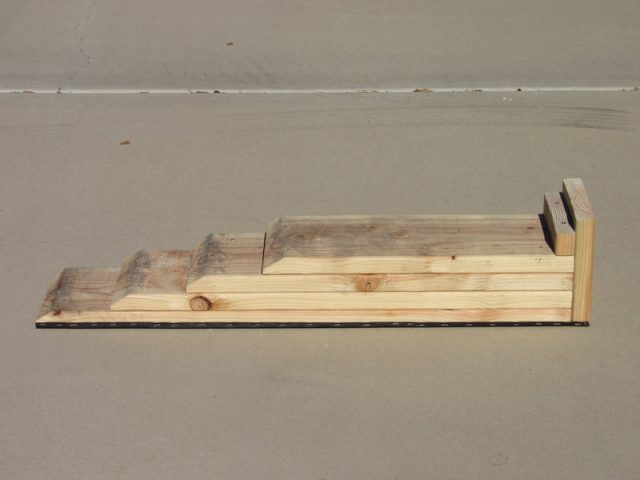
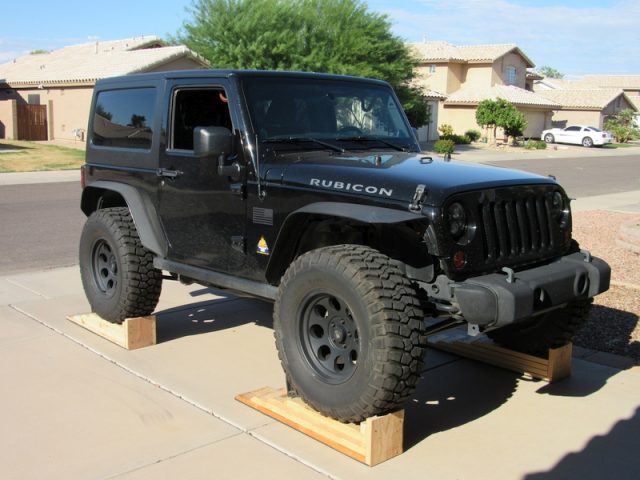
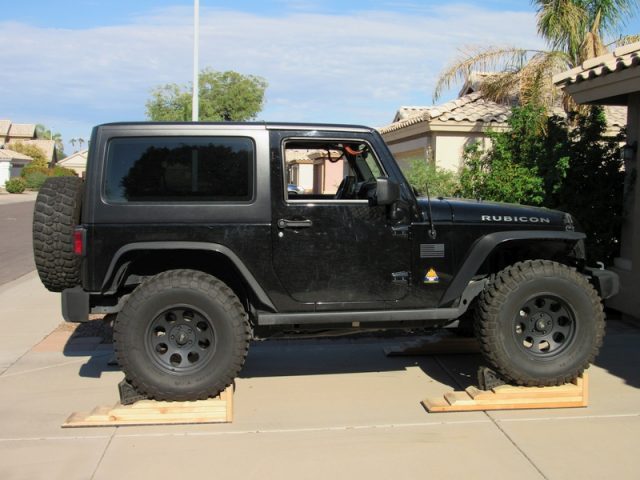
STEP 1: Cut the 12-ft piece of lumber into pieces measuring 42″, 36″, 30″, 25″ and 11″ (144″ = 12′). You can cut it to different dimensions if you prefer, these just worked for me personally. I wanted to have four steps giving me a total of 6″ in height with the top level long enough for my 35″ tires. You can change the length of the pieces if you’re building a ramp for a lower profile car.
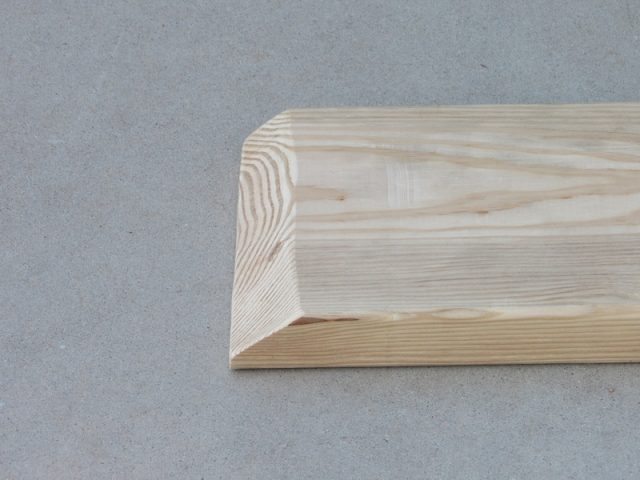
STEP 2: Bevel the edges 45 degrees. It will make the transition between steps smoother, however you’ll still feel the tire moving up over each step. You can count how many steps you’ve taken as you drive up, so you always know where you are. You can’t do that with the single incline ramps.
STEP 3: Attach second level to the first level using wood screws. Pre-drill pilot holes for the screws to prevent the boards from splitting. As you attach the third and fourth levels remember to offset the locations of screws to create stronger bond.
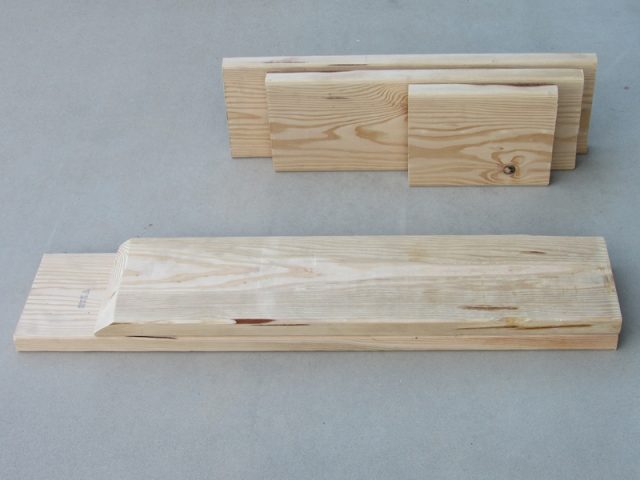
STEP 4: Attach the small piece of wood vertically at the end of the ramp to create a stopper. The design of the stopper is up to you, just make sure it’s big enough for your tires and attached to the ramp firmly.
You can cut the top 2″ off and create a double stopper which is even stronger.
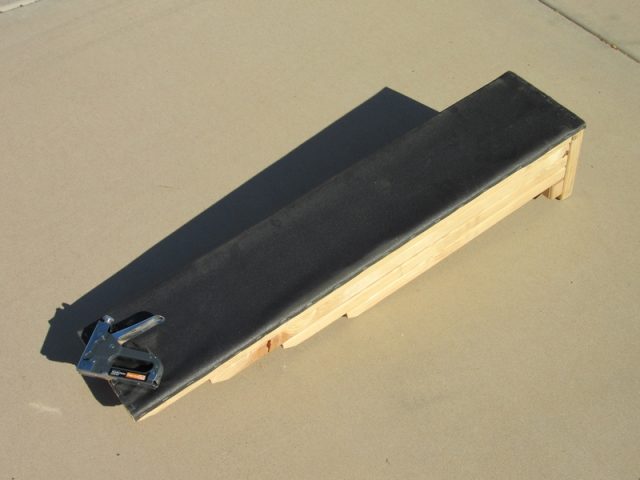
STEP 5: Cut the shelf liner to size and attach it to the bottom of the ramp with heavy duty staples. If you buy the 20-in wide roll of shelf liner, you can just cut it in half and it will perfectly fit the bottom of the ramp. The liner is made out of soft rubber material so it will prevent the ramps from sliding as you drive onto them. It is not necessary since the ramps are seriously heavy, but I believe it makes the ramps even safer to use.
Place ramps the same distance from tires, preferably right against them. I like to take advantage of Jeep’s 4LO gear to drive up onto the ramps, since it gives me the most control, and you don’t have to step on the accelerator to hard.
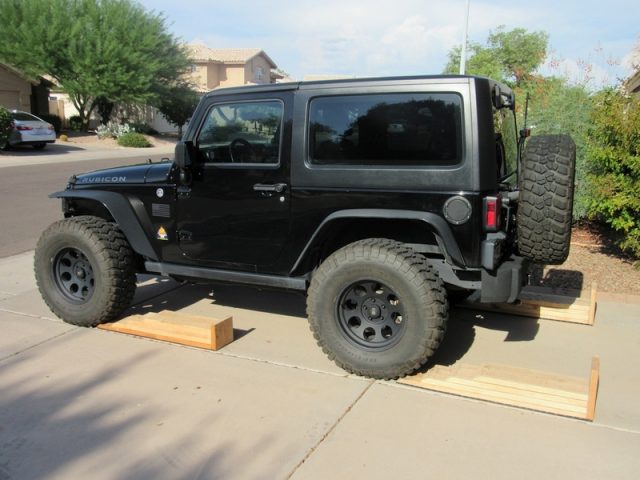
Remember to place wheel chocks against the tires once you’re on top of the ramps. It’s for your own safety.
If you have any suggestions or ideas for better wooden ramps, feel free to comment below.
One thought on “Do-It-Yourself wooden car ramps”
Leave a Reply
You must be logged in to post a comment.
Thank you for the great idea!